
Make Easter egg embroidery by filling in a simple egg shape with lines of thread. This is a cute kids’ craft idea!

Disclosure: This blog contains affiliate links. As an Amazon Associate and member of other affiliate programs, Keri Houchin earns a commission from qualifying purchases at no additional cost to you.
We love decorating hard boiled eggs for Easter at my house. We usually eat all of them too. (It helps that we don’t dye more than a dozen.)
What I don’t love though, is the mess. Dying eggs is only a little messy and fairly easy to clean up. After we dye the eggs and pop them back in the refrigerator though, they sweat. Does anyone else have a sweaty egg problem?? When the eggs sweat, the dye runs. And when the dye runs, whoever touches an egg – ahem, me – also gets dyed. It doesn’t come off of my hands as easily as it does the egg, so then everything else I touch has fingerprints.
Maybe I’m being dramatic, but it’s a disaster. I’m good at fixing disasters though, so I came up with a mess-free egg-dying alternative. Follow along on this Easter egg embroidery tutorial and make some really cute eggs that will last.
Easter egg embroidery tutorial
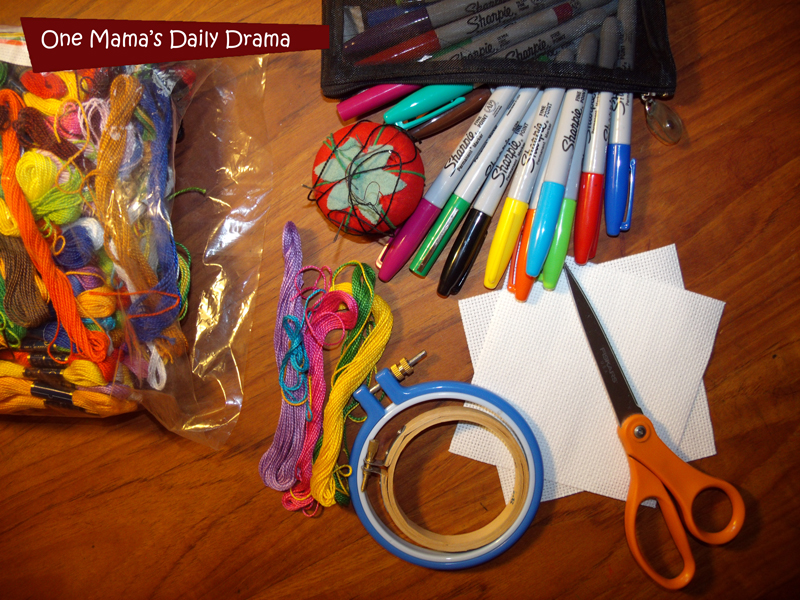
Embroidery supplies
- aida cloth, size 14
- large embroidery needle
- embroidery thread, assorted colors
- 3″ round embroidery hoop
- Sharpie permanent marker, any colors
- egg template, optional (I just searched online for an egg shape, but you can also freehand it or trace something else.)
Embroidery steps
Step 1: Set up the hoop
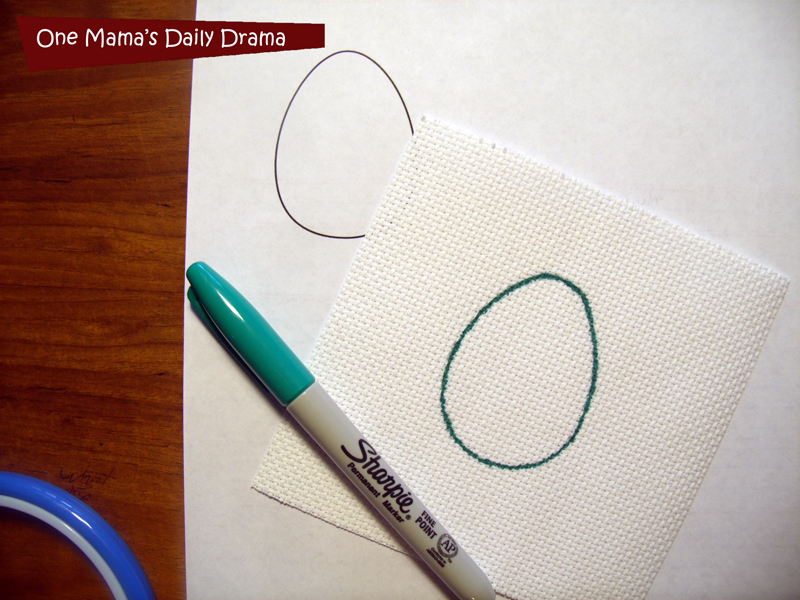
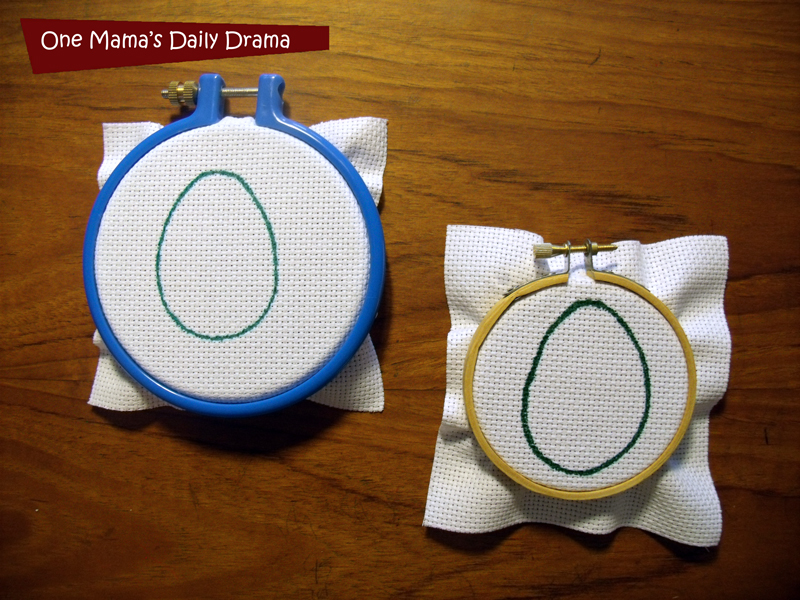
Start by cutting the aida cloth into a square that is slightly larger than the hoop. Using a permanent marker, trace the egg template onto the cloth. I just held mine up to the window so I could easily see through it. Open the hoop, put the fabric between the rings, and tighten it all together.
Step 2: Outline the egg
Thread about 12 inches of embroidery thread onto the needle and tie a knot at the tail end. Do not knot the thread near the needle end or it won’t fit through the cloth. Begin by tracing around the marker with the thread using a back stitch.
How to back stitch: Pull the needle up through the back of the fabric. Insert it back into the fabric through the next hole. Pull the needle up through the third hole and insert it back into the stitch you just went down into. Pull the needle up through the next empty hole and back into the stitch you just went down into. Repeat as needed.
Step 3: Fill in the egg
You can fill in the egg lots of way. My kids just made up their own patterns. Start at one “corner” of the egg and stitch back and forth across. Change colors as often as you like to create a pattern or be completely random.
Straight lines: Use a back stitch.
Zig-zag: Use a back stitch, but follow the holes diagonally back and forth.
Xs: Imagine each set of four holes is numbered 1 thorugh 4, clockwise, starting at the top left. Pull the thread up through 1 and back down through three. Pull up through 2 and back down through 4. Repeat.
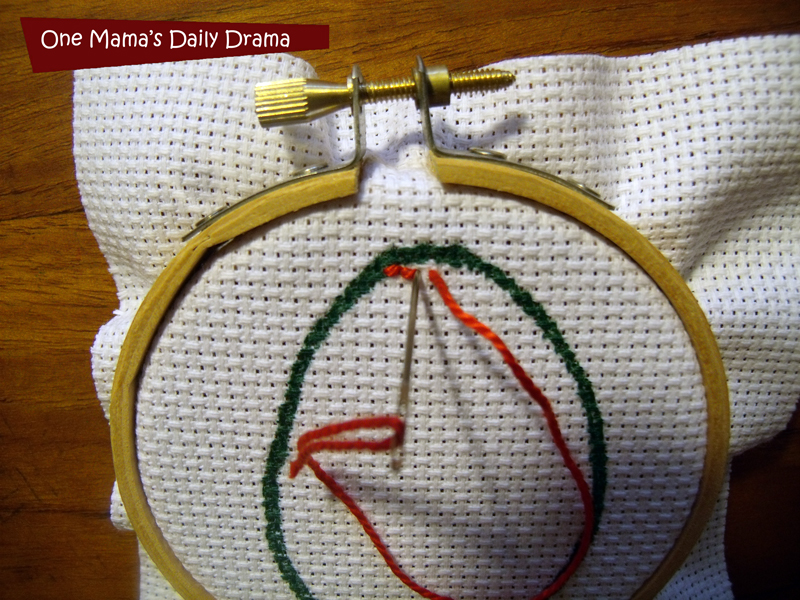
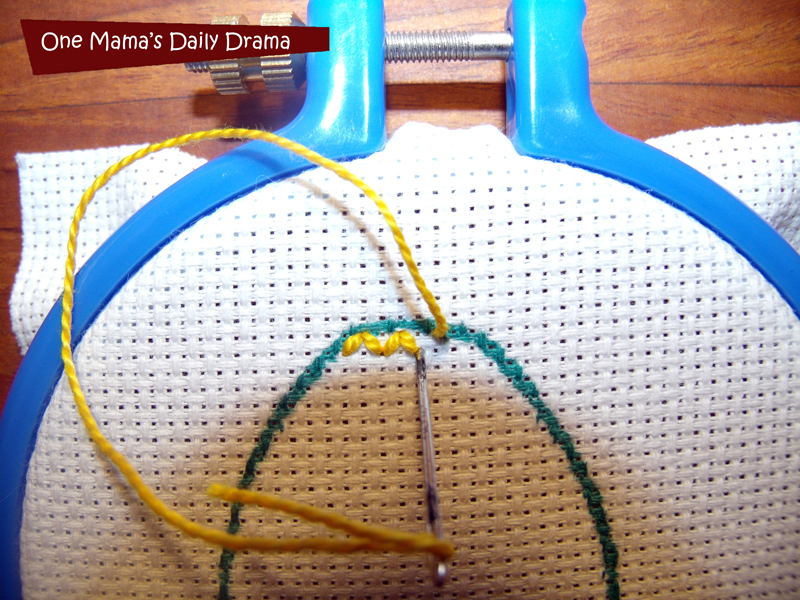
When you finish a piece of thread or want to change colors, just cut it off with about a quarter-inch tail. The stitches are close enough together that they will keep it from pulling out. Thread your needle again and continue.
My kids loved this project. It took them a long time to do it though – about a week. Both kids worked on their eggs for a few minutes here and there. I would say this is a great hands-on activity for kids (or adults) who need to fidget with something while watching television. My kids are 7 and 10. For younger kids, I recommend using a cloth with bigger holes and a plastic needle.
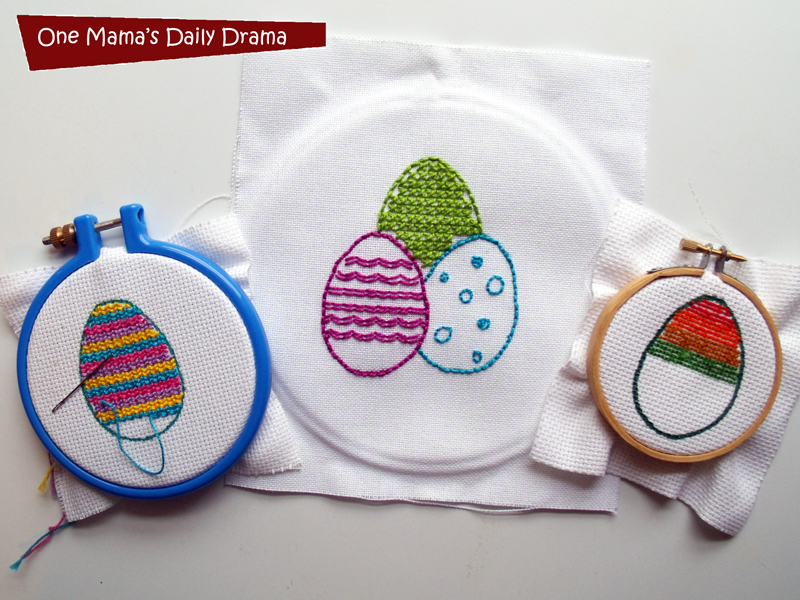
I’m planning to iron the back side of each egg and pop them into a frame to display for Easter. They’re really pretty and my kids are so proud of their artwork.
What’s next? Try these other fun and creative ideas on One Mama’s Daily Drama:
Very cute idea!
Thank you, Stacy!