
Learn the basics of bead weaving for beginners, then create a cute summer bracelet with a colorful watermelon pattern.

Disclosure: This blog contains affiliate links. As an Amazon Associate and member of other affiliate programs, Keri Houchin earns a commission from qualifying purchases at no additional cost to you.
I learned the basics of bead weaving when I was a teenager. It’s a fun scout activity for kids from about age 10 up through teens. Younger kids may enjoy it, but tiny seed beads are easy to spill and detailed waving takes some time and patience.
While I learned by using a loom, there’s no need to purchase one if you’re just getting started with bead weaving. This summer I made an easy watermelon bracelet pattern using a clipboard to hold my cords.
This is a fun summer craft for adults or kids. Read through the basics, then find a detailed tutorial on how to make this watermelon bracelet.
Bead weaving basics
Bead weaving without a loom
Having a bead weaving loom is handy, especially if you’re making a lot of bracelets and similar crafts. But if you’re just getting started or just don’t want to buy one more bulky craft tool, try this.
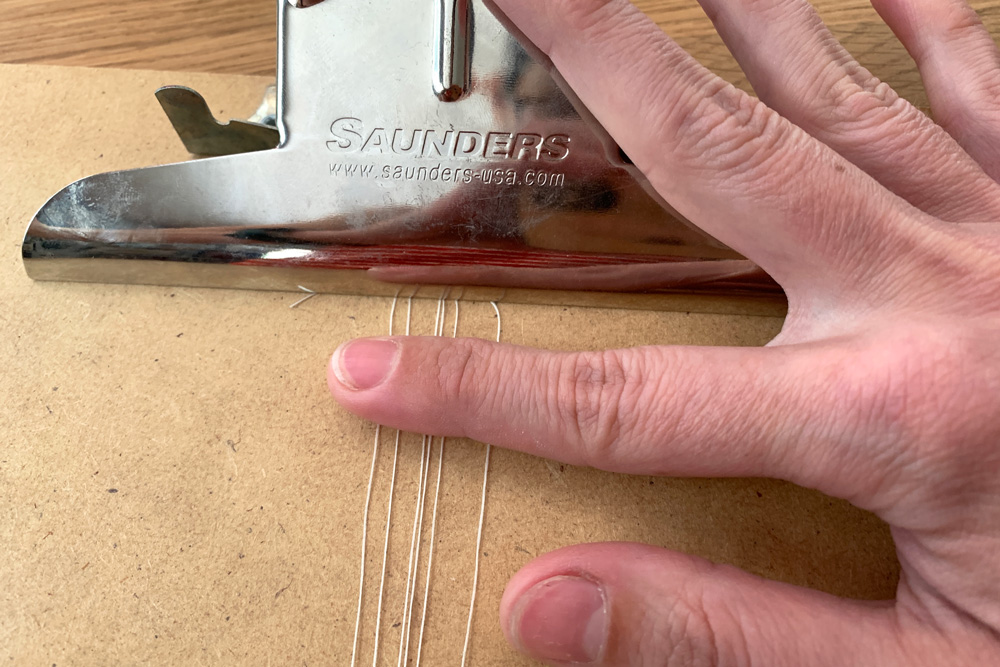
Use a combination of washi tape and a clipboard to hold your cord while you work. Washi tape will hold one end securely, while the clipboard clip can open and close as needed.
If you find it hard to get under the bracelet on the clipboard, I use a knitting loom hook to lift the edge. You could also use a crochet hook, a pencil, or a hook from your child’s loom band kit.
Design your own bracelet patterns
This tutorial shows how to make a bead weaving bracelet in a watermelon pattern. You can use just about any bead color along with this technique to create simple bracelet patterns.
Use gridline paper and colored pencils to plan out other designs. This craft is similar to pixel art or Perler beads, so searching for those types of patterns will give you lots of ideas!

Tips and troubleshooting
Uneven beads
Seeds beads are usually made of glass and they’re not all exactly the same. I try to avoid using beads that are obviously too thick or too thin. But ultimately, your bracelet probably isn’t going to be 100 percent even.
Skipped rows
For every row, the horizontal cord should go under the vertical cord to the left, then over the vertical cord to the right. If you skip a single bead and catch it quickly, you can undo your stitches to fix it. You’ll notice a skipped stitch because the weaving cord rows aren’t holding it down. (In the photo, the skip is on the second row from the top, between the green beads.)
If you don’t notice until the end, this won’t make your bracelet fall apart. The 2 beads on either side of the skipped stitch just won’t hold together flatly like the others.

Slippery jewelry cord
Some jewelry cord has a slippery texture, so knots don’t feel like they will hold forever. You can put a dap of jewelry glue on each knot to hold it in place. Super glue also works in a pinch, but be careful not to glue it to anything (fingers, clipboard, etc)!
Running out of weaving cord
Unless your bracelet is very small, you’ll probably run out of weaving cord before you get to the end. First, leave an inch or so on the weaving cord and tie it several times around the end cord. Then cut another length of cord and tie it on the same way you would when beginning a new bracelet. Leave the tails and weave them in or cut them off at the end.


How to make a watermelon bracelet
For this watermelon bead weaving pattern, each row consists of 2 lime green beads and 3 red beads. Randomly, replace one of the red beads with a black one to resemble seeds.
Supplies
- clipboard
- washi tape
- scissors
- jewelry pliers – These are great because they can bend, cut, and flatten.
- loom hook
- 0.3 mm clear jewelry cord
- sewing needle – It must be thin enough to go through the beads easily.
- seed beads – I’ve found the 12/0 size to be easier to use than the smaller ones.
- a small dish to hold the beads
- cord end caps
- magnetic clasps
- jump rings
Instructions
1. Set up the jewelry cord on a clipboard.
Start by measuring your wrist (or the person you’re making this bracelet for). Measure and cut 6 strands of jewelry thread that are about twice as long as your wrist measurement. This will give you plenty of extra on the ends.
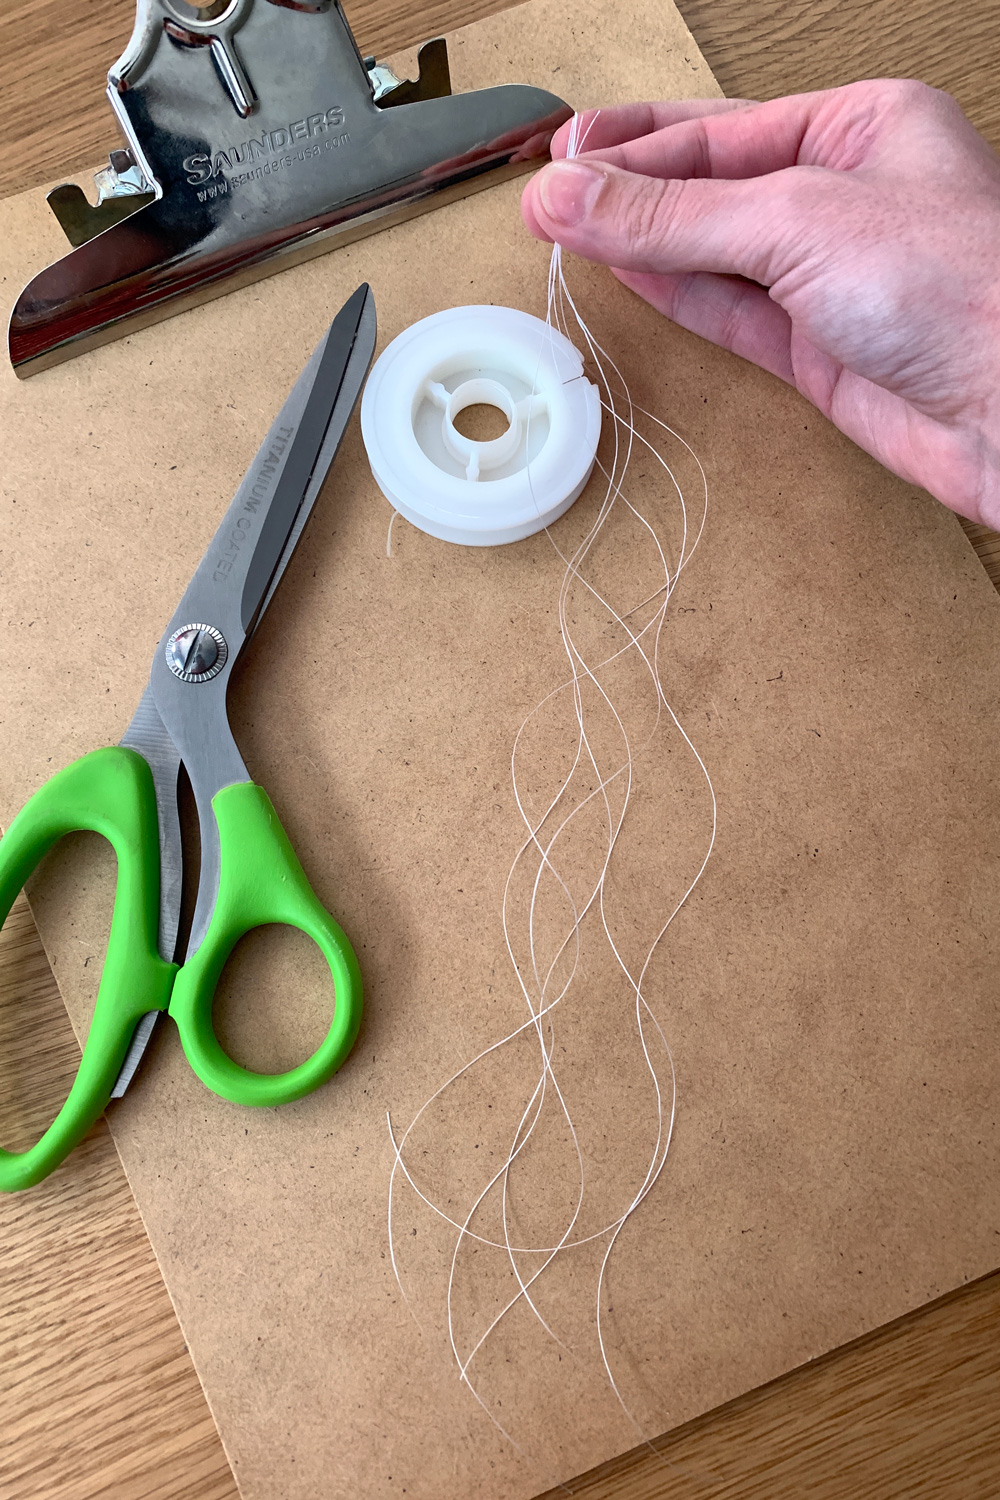
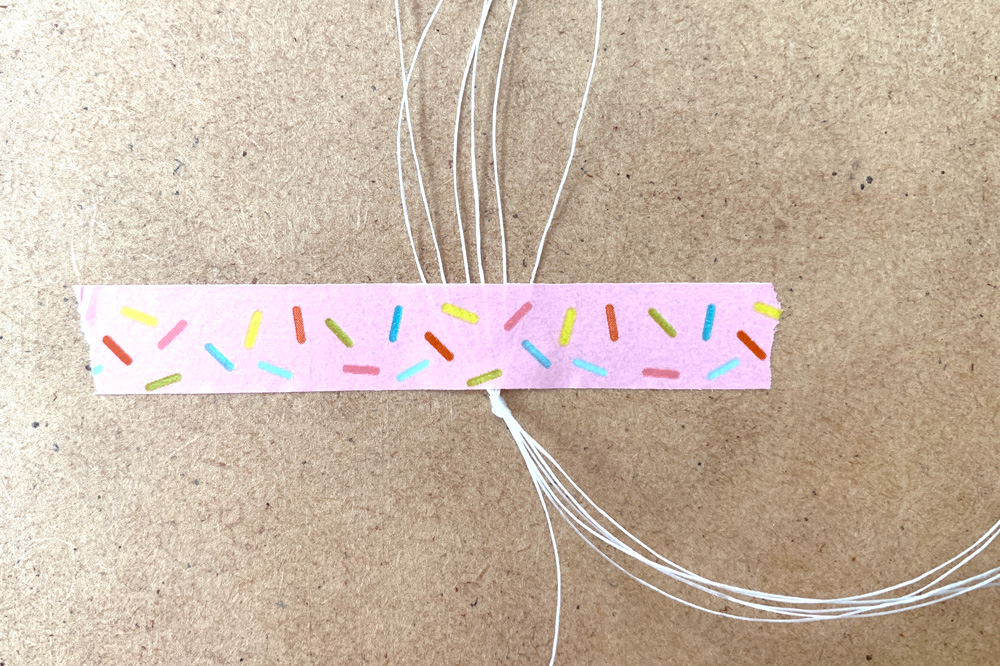
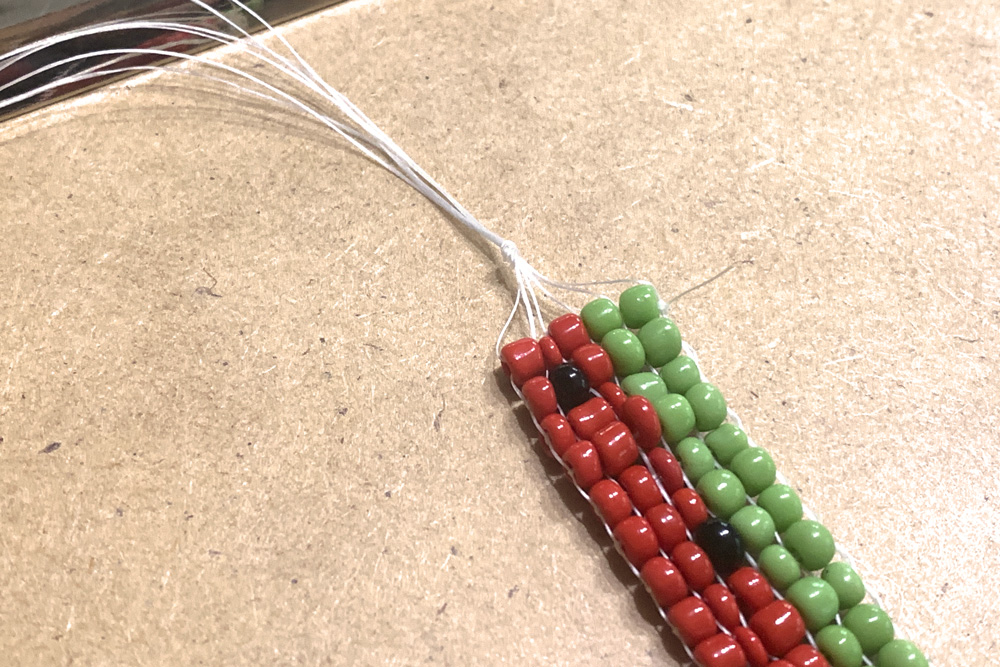
Leave about 2-3 inches and tie all 6 pieces in a knot on one end. Use the washi tape to attach that end to the clipboard. Fan out the strands so that they lay flat.
Stretch the cords across the clipboard, keeping them in order and flattened. Pinch them in the clasp to hold them in place.
2. Begin bead weaving.
Next, cut another length of jewelry cord that’s as long as you’re comfortable with managing. The cord I’m using doesn’t tangle, so mine is about 36 inches long. Thread the needle onto one end. (I’m calling this the weaving cord for clarity in this tutorial.)
Pour the beads you’re using into a small, shallow container so they’re easier to handle. I usually grab the lid of a handy container. From right to left, thread the first row of 5 beads onto the needle.
Slip the needle under the cords and line up the beads so that there is a cord between each one, as well as on both ends. Hold the beads in place and pull the needle and weaving cord through, leaving a tail several inches long on the right.

Thread the needle back through the beads left to right, this time making sure that the needle is on top of all the cords. I’ve found the easiest way to do this is to place a finger under the beads so they stick up above the cords just a tiny bit. Tie a knot on the right using the weaving cord and tail to hold this first row of beads in place.

3. Follow the weaving pattern.
For the second row, thread the next 5 beads onto the needle. Go under the cords, right to left, just like with the first row. Pull the weaving cord tight, then thread the needle back left to right through the beads, making sure that the needle is on top of all the cords this time.
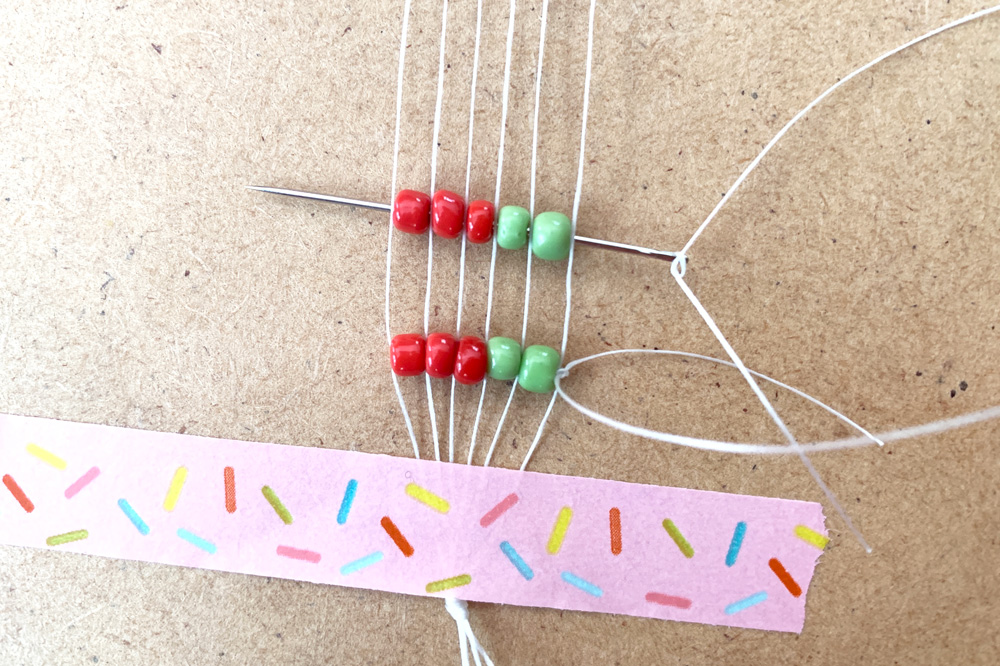
Repeat each row, following the bead pattern and keeping the weaving cord tight. Each row should line up squarely with the one before it.

4. End the bracelet pattern.
Continue repeating the pattern as needed until the beaded length is the same as the arm measurement you took at the beginning. (If you want a tighter fit, the beads can be about a quarter-inch shorter than your arm measurement, or however wide your cap/jump ring/closure combo is.)
When you’re happy with the bead length, loop the end of the weaving cord around the end cord and tie several knots. Remove the needle and trim the end of the weaving cord to an inch or so.
Remove the loose ends of the cords from the clipboard clasp. Make sure the woven beads are snugly lined up, then tie the cords in a knot, just like the opposite end. Remove the tape from the other end of the cords.
5. Finishing the bracelet ends.
To wear the bracelet, you can just tie the ends around your wrist, but a nice tidy closure makes it much easier to get on and off.
Trim the end of the cord close to the knot. Center a cord end cap over the knot and use the jewelry pliers to crimp it closed tightly. Test to make sure the knot doesn’t move. Repeat on the other end.

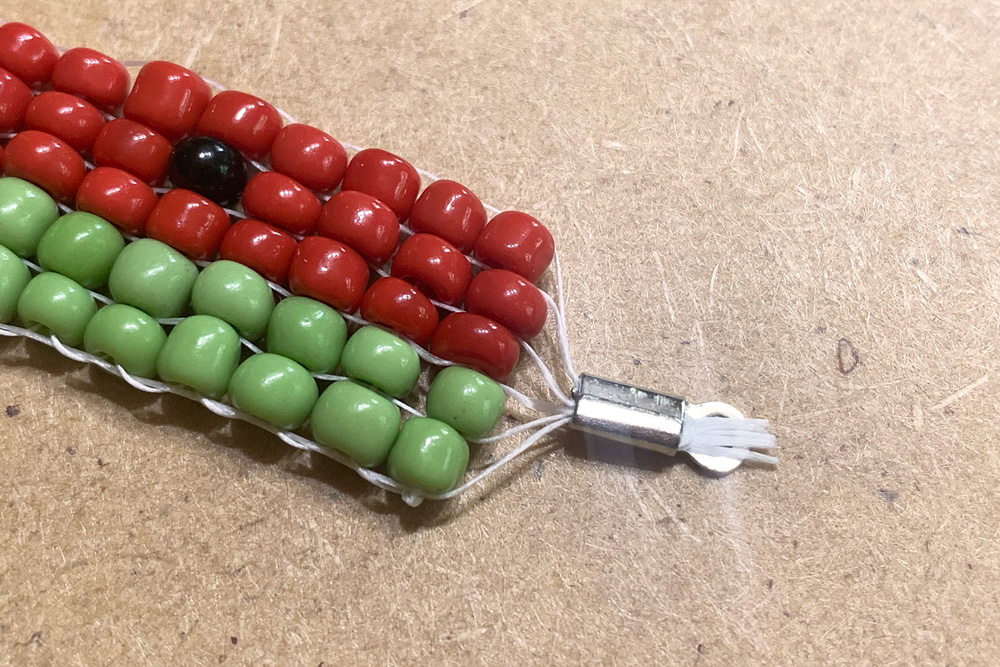
Next, open a jump ring using the pliers and slide it through the hole in the end cap. Take one half of a magnetic clasp and add it to the jump ring. Pinch the ring closed. Repeat on the other end using the other half of the magnetic clasp.
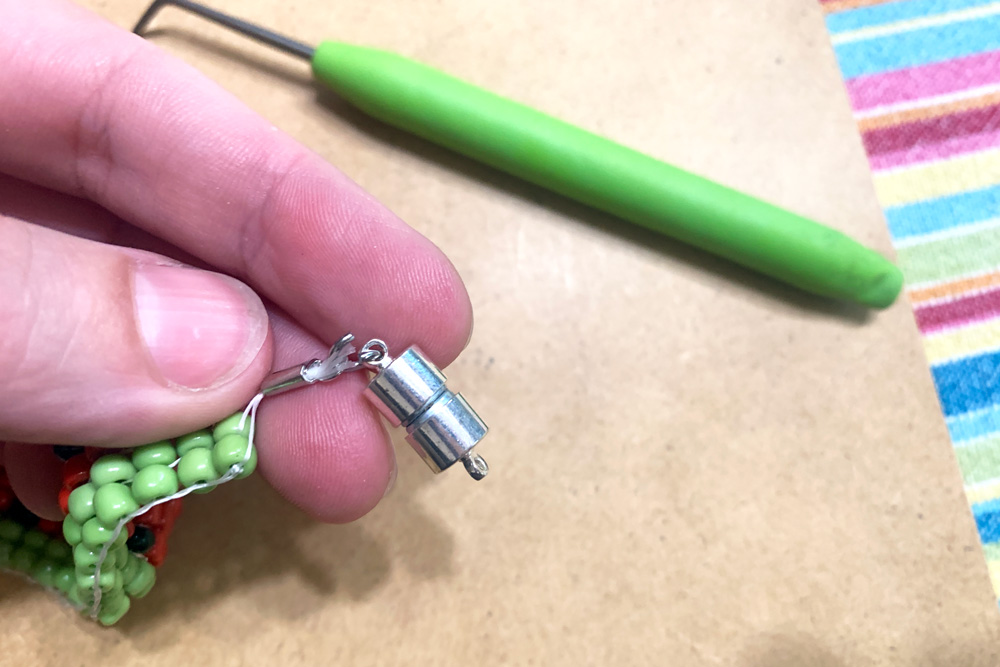
Trim any loose thread tails. I like to tuck mine back through the beads so that the trimmed end is opposite where the knot is. I think this gives it just a bit of extra security.

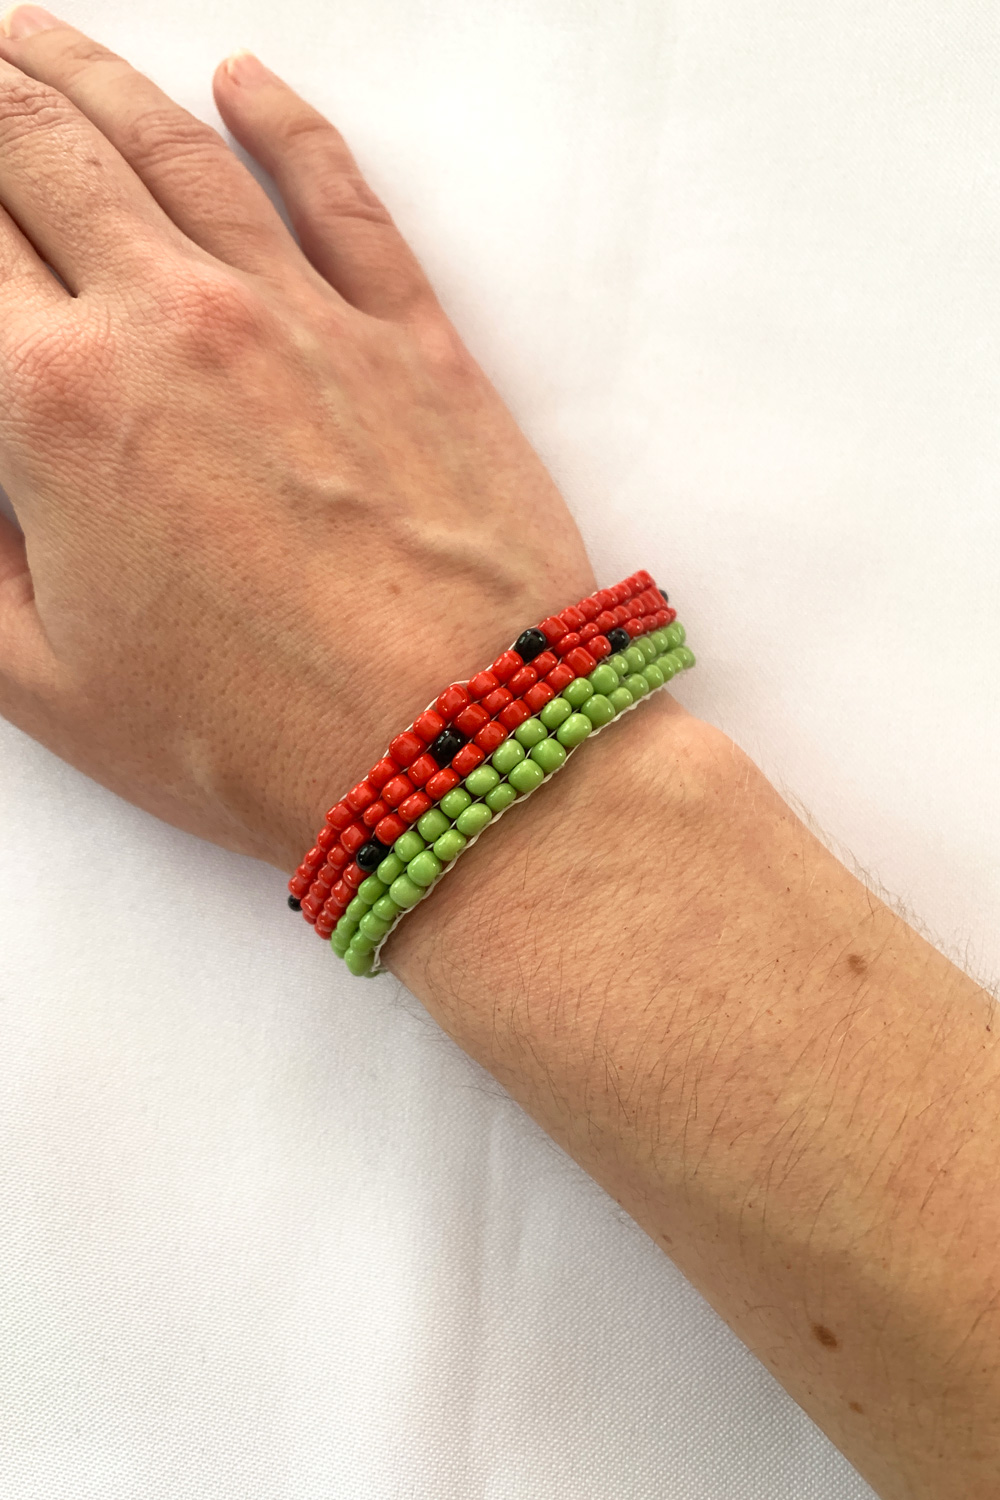
Show off your finished bracelet this summer! Pair it with a colorful outfit, or make more bracelets to stack with it in different colors.

What’s next? Try these other fun and creative ideas on One Mama’s Daily Drama:
Leave a Reply