
A letter board is a cute way to change up your decor with the seasons without spending much. These DIY spring letter board accessories are easy to make with paper.

Disclosure: This blog contains affiliate links. As an Amazon Associate and member of other affiliate programs, Keri Houchin earns a commission from qualifying purchases at no additional cost to you.
“Spring is nature’s way of saying Let’s party!“
I love changing out my letter board with different quotes for the month or season. This one is attributed to Robin Williams, though there’s no evidence he actually said it. But I love the sentiment no matter where it came from.
Spring feels like a burst of warm sunshine after a long, chilly winter. And that is definitely something to celebrate!
How to make letter board accessories
Supplies
I’m assuming you already have a letter board if you’re looking for accessories, but if not there are a ton on Amazon.com!
- scrapbook paper
- thin cardboard or chipboard
- cotton cord
- circle paper cutter
- scissors
- tacky glue
- pencil
- letter board pieces (I chose a few that I have extras of: O and Q)

Instructions
First, cut out a 1-inch circle of cardboard for each piece that you’re going to make. You want the cardboard to be just a hair larger than the letters, which will serve as the backing for the letter board accessories.

Next, cut out all the paper pieces.
I drew the sun by hand, but you could trace something, use clipart, or print out the images from my kawaii corner bookmarks {sun, cloud, star}.
I also cut a 1-inch circle from a different shade of yellow for the center of the sun.

To make the cloud, I traced one of the cardboard backing pieces a few times, overlapping the edges. For the rainbow, I just cut out concentric circles. I started with the smallest size on my paper cutter {1 inch} and increased by 1/4 inch for each color.

For the banner, I cut a 2-inch rectangle and the cut it into triangles. Again, you could trace something or use a ruler for more uniform pieces.
I also cut a piece of cotton cord about 10 inches long.

These are all the pieces I cut, laid out.

To start assembling, glue the letters to the cardboard circles. I used the O for the sun and the Q for the rainbow cloud since the extra leg would be hidden. Let this sit and dry for at least 10 minutes. It doesn’t have to be 100% dry, but you don’t want this part to separate while you are attaching the next part.

Next, layer the paper pieces for the sun and the rainbow cloud and glue them together.

Glue the cardboard letter section to the back of the sun and rainbow. Keep the direction of the letters in mind while you are gluing them. The legs have to go into the letter board horizontally.

Glue the triangle banner pieces to the cotton cord. Let them dry for 10 minutes or so.

Spring letter board accessories
Make sure everything is good and dry before you add it to your letter board. {One of mine came apart and had to be re-glued.}
There’s really no right or wrong way to put together a letter board. I put my banner across one top corner and taped it in place with washi tape. Then I stuck the sun and the rainbow cloud on the board around the lettering.


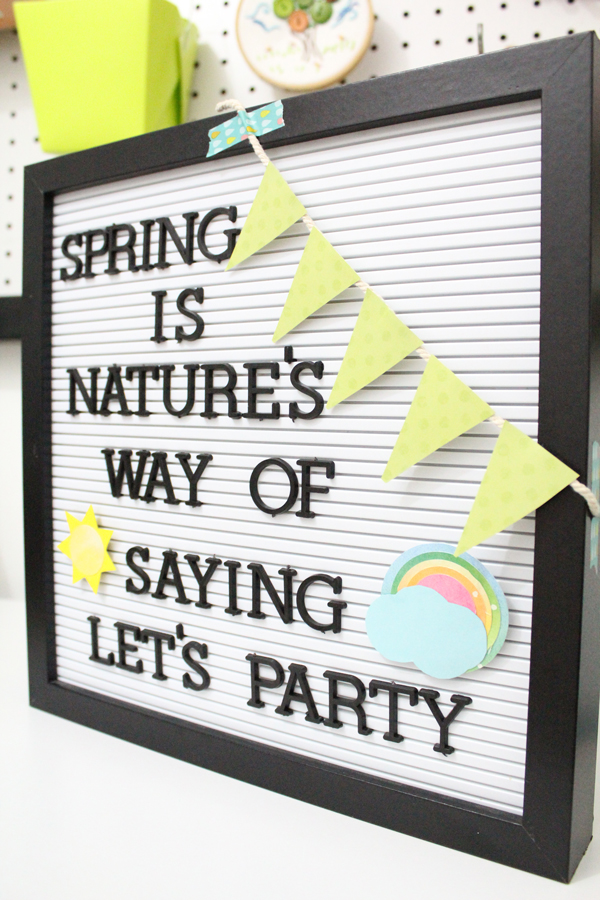
I love how bright and cheerful this looks! And it didn’t take long to make, so I think I’ll be making more soon.

More letter board fun
If you’re looking for more spring letter board ideas, or would prefer to buy instead of DIY, check out these pretty products I found on Amazon.com.

What’s next? Try these other fun and creative ideas on One Mama’s Daily Drama:
Leave a Reply