
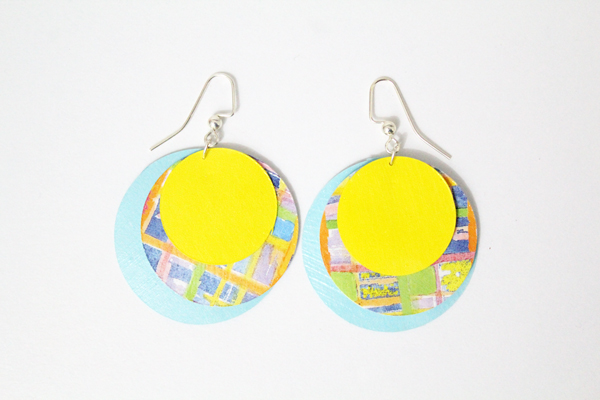
These funky DIY paper earrings are simple to make yourself and look fabulous. They are made from scrapbook paper, so you can use any color or pattern you like.

Disclosure: This blog contains affiliate links. As an Amazon Associate and member of other affiliate programs, Keri Houchin earns a commission from qualifying purchases at no additional cost to you.
I have a stash of scrapbook paper that would probably last me years, even if I don’t purchase any more. I used to do a lot of scrapbooking when my kids were little but don’t anymore. Since I’ve been trying to use up my craft stash instead of buying more, I decided to try making paper earrings.
Not only were these simple to make, but they turned out cute. The patterned paper reminds me of the late 80s and early 90s, which I love, so I found two solid colors to match.
For another great way to use scrapbook paper, try making this cute phone case! And if you love all things retro, follow this tutorial for a funky painted clutch wallet.
How to make paper earrings
Supplies
- paper trimmer*
- circle cutter*
- scrapbook paper
- Mod Podge Gloss
- sponge brush
- fishhook earring hooks {2 per pair}
- jump rings {2 per pair}
- sharp pin
*If you don’t have paper cutters, you can use scissors. You’ll need a pencil, a ruler, and something round to trace to get the size/shape.

Instructions
Start by cutting out your paper. My squares are 1 inch, 3/4 inch, and 1/2 inch. My circles are 1.5-inch, 1.25-inch, and 1-inch.


Once everything is cut out, lay it on a flat surface and brush one side with Mod Podge. I’m not a Mod Podge expert, so there are probably several kinds you can use. Definitely make sure you get a variety that will dry clear!

Let your paper pieces dry for 10 minutes and then flip them over and coat the other side. Let that side dry for 10 to 15 minutes. You want to make sure the whole thing is completely dry.
Take a sharp pin and poke a hole in one corner of each square. They don’t have to be precise but try to line them up so that the hole is roughly lined up for all 3 squares on each earring.

Bend the jump ring {I did this with my fingers} and slide one end through each of the 3 paper squares from smallest to largest.

Add the fishhook and bend the ring closed. Repeat the process for the matching earring and make sure the fishhook goes in the opposite direction.

For the circles, the process is the same but of course, you can poke the pinhole anywhere because there isn’t a corner.

Colorful DIY paper earrings
Do you prefer the squares or the circles?


What’s next? Try these other fun and creative ideas on One Mama’s Daily Drama:
Leave a Reply