
Make a macrame moon wreath for cute and witchy Halloween decor. This DIY tutorial includes how to tie macrame knots and is perfect for beginners.

Disclosure: This blog contains affiliate links. As an Amazon Associate and member of other affiliate programs, Keri Houchin earns a commission from qualifying purchases at no additional cost to you.
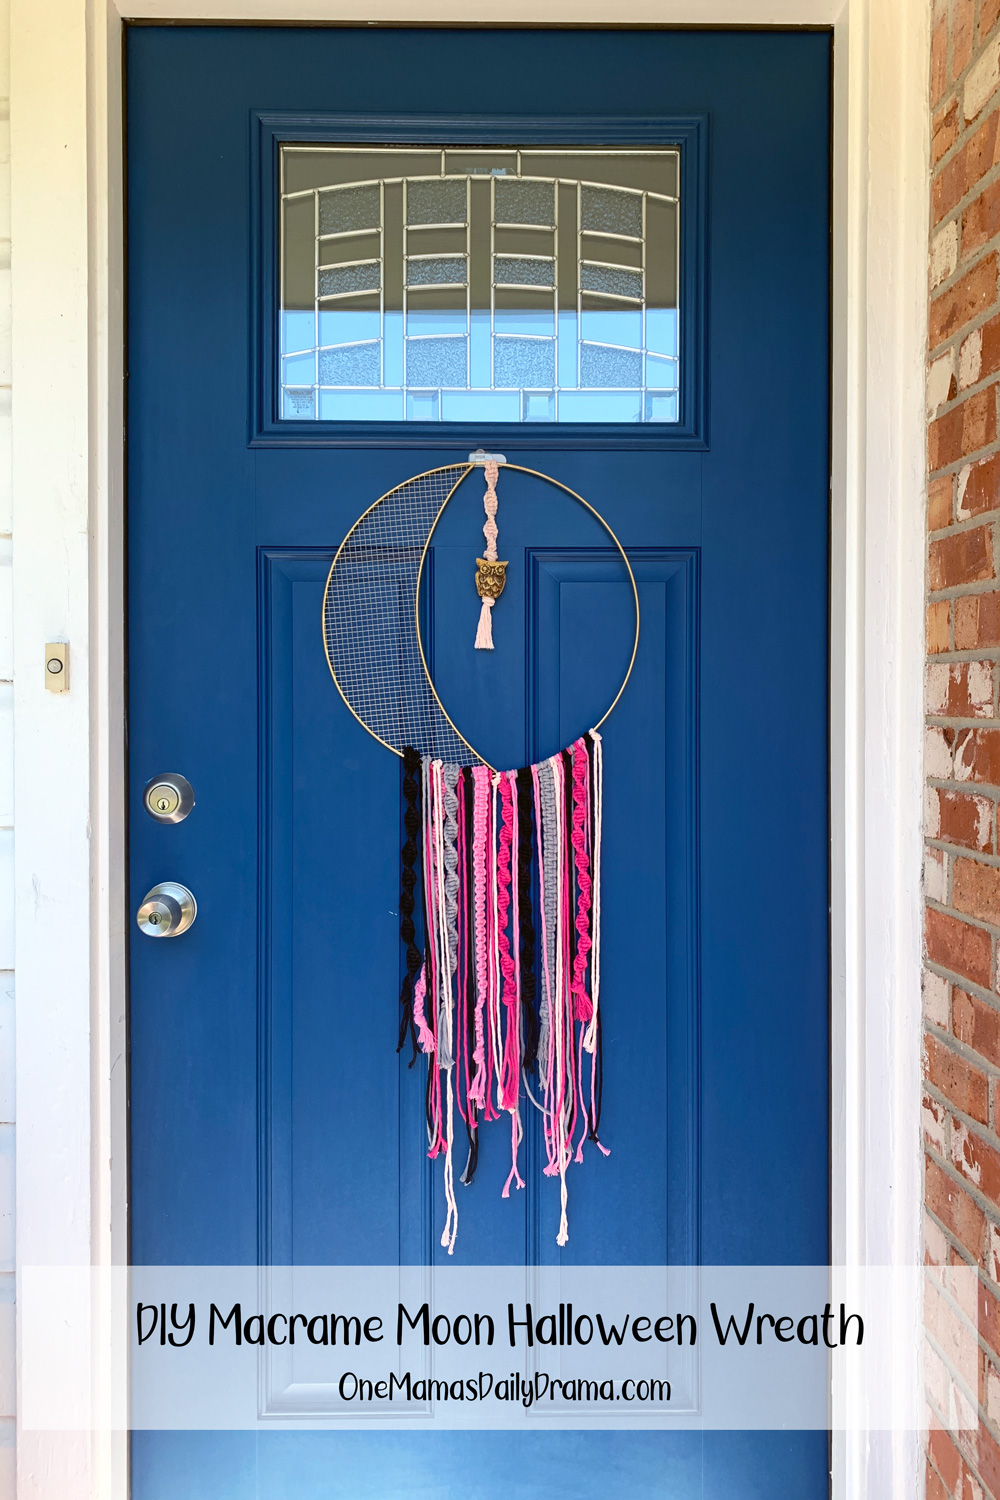
I made this macrame crescent moon wreath to add to my pink Halloween decor theme. It’s super cute to display by itself or with other decorations.
If you like the Halloween tree too, I have a tutorial for painting the wooden ornaments.
A lot of people prefer classic black and orange Halloween, but I love adding pink to that color combo for an unexpected twist. It feels like the perfect blend of wacky kid-friendly fun and a more refined adult decor style.
You might even want to display this wall hanging year-round if your home decor is cottagecore or retro style!
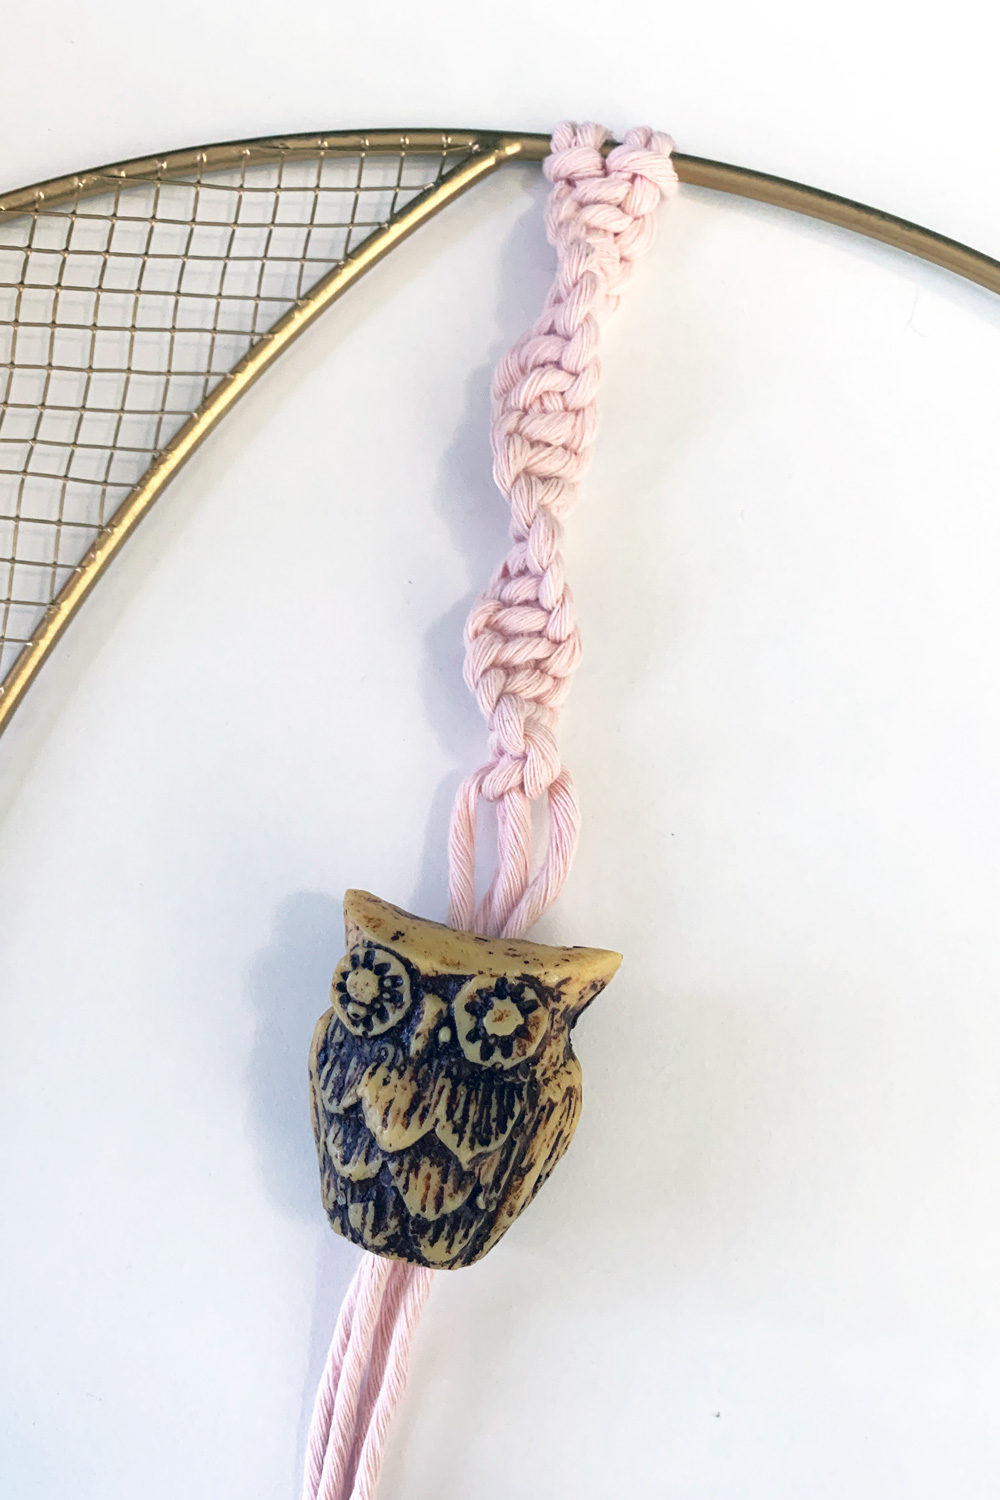
The owl bead is vintage, I think, and unfortunately, I haven’t been able to find anything similar online to share. Any charms could hang from the end in place of the owl too. A bat, star, or a witch on a broomstick would be fun.
Macrame wreath tips
I’ve only made a few macrame crafts and this one is pretty easy, even if you’re never tried it before!
- FYI: The black cord in these packages colored my fingers a bit. None of the other colors did and it washed off easily.
- You can make this in any color to match your decor!
- The bigger your macrame cord, the bigger the knots and tassels will be. You can do this craft project with really thick cord or really thin cord and the only difference will be the size.
- If you can’t find macrame cord, 100% cotton yarn will work too. Just remember that yarn is thinner, so the knots will be smaller. Yarn is also harder to untie if you make a mistake.
- The cord is pretty long, so it’s easy to get tangled as you tie. Stop and separate the ends of the cords often to avoid getting stuck.
Basic macrame knots
Hitch loop
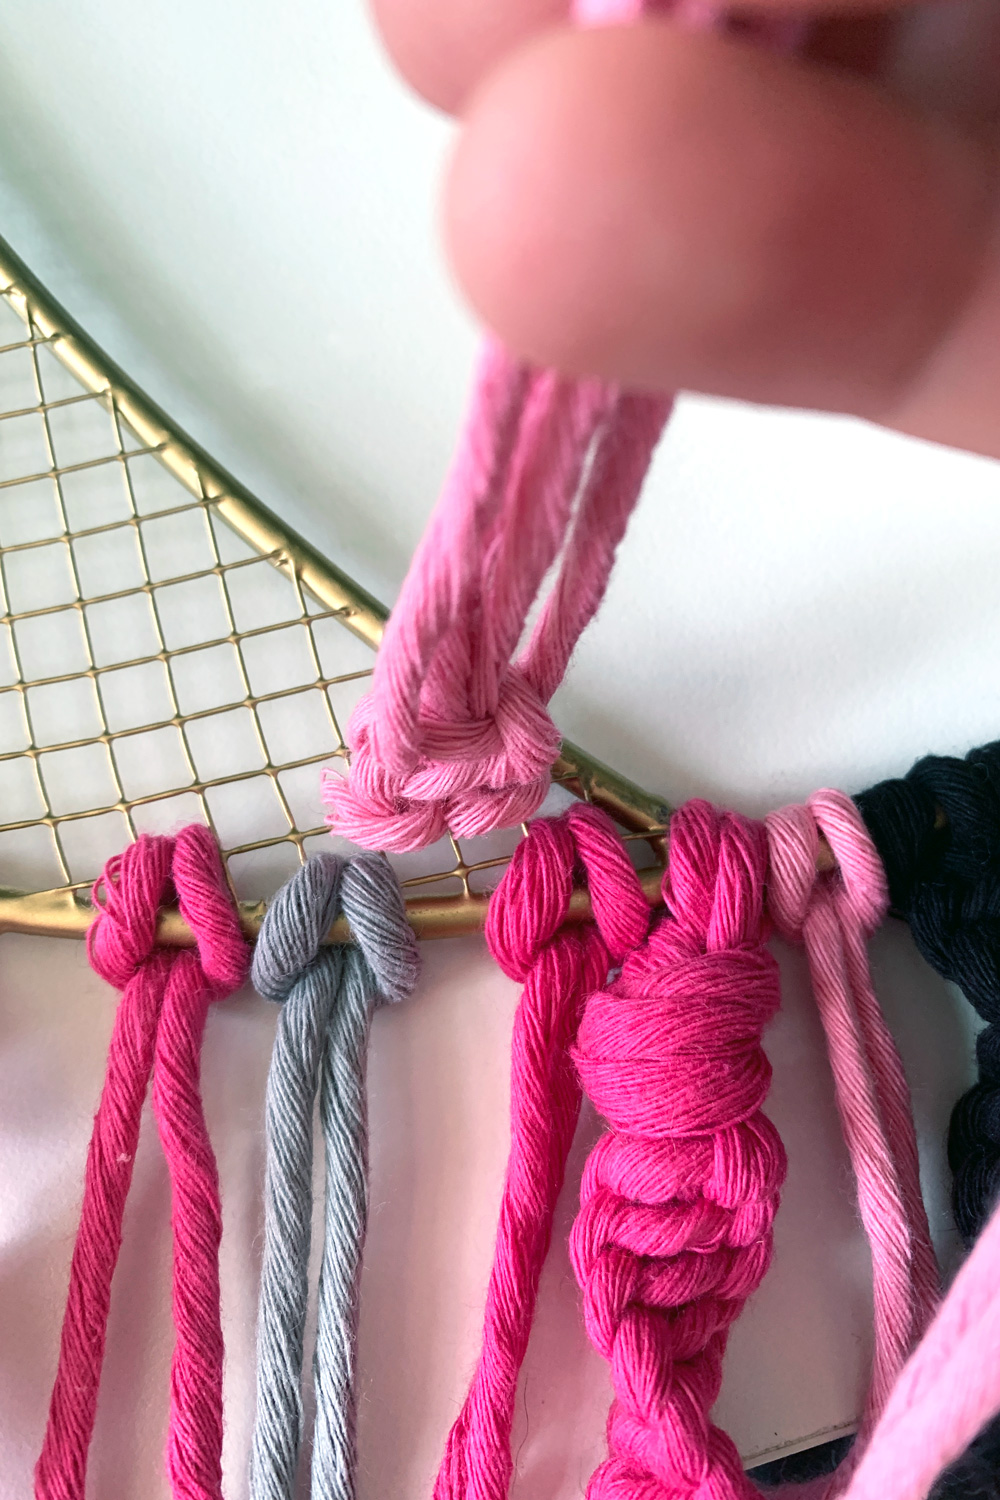
A hitch loop is a basic way to attach the cord to your wreath at the beginning. To tie a hitch loop, fold your cord in half and hold the folded end. Loop it around the wreath form (or whatever you’re working with) and slide the cut ends through the loop. Pull snug to close.

Overhand knot
An overhand knot is one you’re already familiar with, even if you don’t know its name. To tie an overhand knot, simply gather all the cord together, wrap it around itself, and through the hole it creates.

Half knot
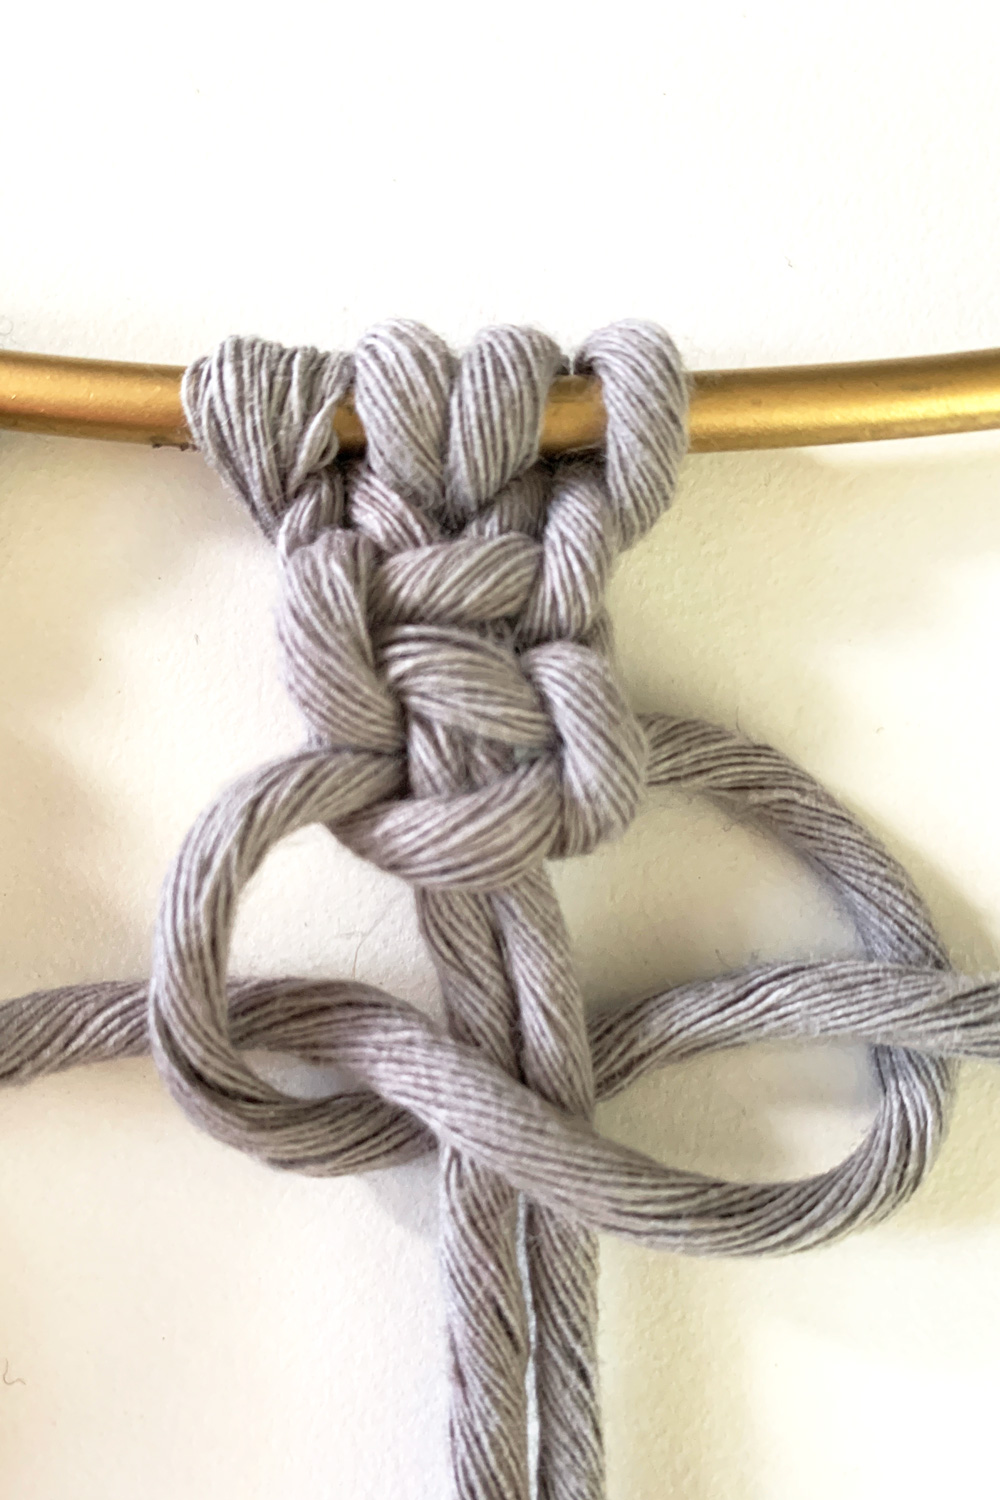
A half knot is one of the most common macrame knots. It creates a long chain that will spiral around itself. To tie a half knot, line up the 4 pieces of cord. Place cord 1 over cord 2 and cord 3. Wrap cord 4 over cord 1 and behind cord 2 and cord 3. (This looks kind of like a pair of figure 8s; they should mirror each other.) Pull tight to close.
Repeat this pattern to create a spiral. Cords 2 and 3 shouldn’t move. Cords 1 and 4 will get shorter faster.


Box knot
A box knot is also one of the most common macrame knots. It creates a long chain that will lay flat. To tie a box knot, first, make a single half knot. Line up the 4 pieces of cord. Place cord 1 over cord 2 and 3. Wrap cord 4 over cord 1 and behind cord 2 and cord 3. (This looks kind of like a pair of figure 8s.) Pull tight to close.
Now instead of repeating the pattern like you would with a half knot, do the opposite. Start with what is now cord 4 and place it over cord 2 and cord 3. Wrap cord 1 over cord 4 and behind cord 2 and cord 3. Pull tight to close.
Just like with the half knot, cords 2 and 3 shouldn’t move. Cords 1 and 4 will get shorter faster.

How to make a macrame wreath
Supplies
- Gold mesh crescent moon wreath frame
- Macrame cord – I used Bead Landing 3mm pink macrame cords and black macrame cords. This wreath uses 8 spools of cord, so you’ll need 2 packages of each color.
- Large wooden owl bead – Mine is vintage. Any large bead will work.
- Scissors
- Copper wire micro-LED lights
- Command Outdoor Light Clip, optional for hanging
Instructions
1. Cut and attach cord pieces.
In the macrame cord packs I used, each roll measures 6.5 yards. For each macrame knot, cut one piece of cord in half – 3.25 yards (117 inches).
Start with one piece of cord in the center. Fold it in half and use either a hitch loop or overhand knot to attach it to the bottom of the wreath frame.
Add the other one beside it. Smooth out the cords and untangle them if needed. You should have 4 cord tails hanging from the wreath.
2. Make macrame knots.
Choose either a half knot or box knot and begin tying. Repeat the same knot all the way down until you get about 4 inches from the end. Tie an overhand knot to secure the end.
You’ll notice that 2 of the cords are much longer than the other 2. Trim the longer tails so that they’re all about the same length. Save the cutoff pieces for step 3.
3. Add extra hitch loops.
Take the cutoff pieces from step 2 and attach each one to the wreath frame using a hitch loop. As you add more macrame knots, you can add and move the hitch loops however you like.
4. Make additional knots and loops.
Repeat steps 1 through 3 to add as many macrame knot chains as you like. Create a mix of half knots and box knots, or make them all the same. Every time you finish one, use the cutoff cord pieces to add more hitch loops.
Don’t worry about creating a pattern. Mix up the colors you use, the type of knots you tie, and where you place them. You can loop the cords around the open section of the wreath or through the smaller wire grid.
5. Make hanging owl knot.
When you’re happy with how the bottom section looks, cut one last piece of cord in half (2 strands of 117 inches). Fold each of the strands in half and attach them to the top of the wreath using a hitch loop.
Tie 20 half knots, the tie a snug overhand knot. Slide the bead onto the cords and up against the knot, then tie a second overhand knot to hold it in place. Leave about 2 inches of cord hanging and trim the ends. Unravel the tails to create a tassel if you like.
6. Attach the LED lights.
To make the moon light up, weave the LED lights back and forth across the grid. Start at the bottom and loop the battery pack with the switch behind the hanging cords for easy access.
Be gentle with the thin copper wire and avoid crimping it in a tight angle.

This wreath is so cute and once you get the hang of tying the knots, it’s pretty quick to make too. You can easily change up the knots and placement however you like.
I recommend only displaying this indoors or outdoors in a covered location. I’m hanging mine on my covered front porch for Halloween, but I usually bring my wreaths inside if it’s going to be windy or heavy (ie. sideways) rain.

To hang my wreath, I attached a single Command outdoor light strip to the front door.
What’s next? Try these other fun and creative ideas on One Mama’s Daily Drama:
Leave a Reply