
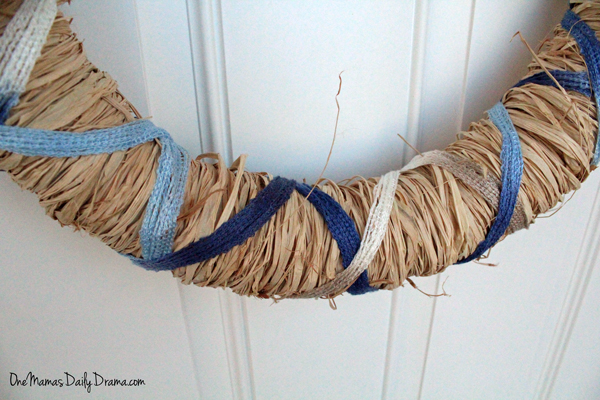
Make a DIY raffia wreath with natural materials and a pop of color for a beautiful way to dress up your front door for spring.

Disclosure: This blog contains affiliate links. As an Amazon Associate and member of other affiliate programs, Keri Houchin earns a commission from qualifying purchases at no additional cost to you.
This post was originally posted in Feb. 2016; it was updated in 2025 for formatting.
They might be overdone, but I love a wreath for simple front door decorating. I’ve made a few different kinds of wreaths over the years – rainbow for summer, tulle for fall, and faux eucalyptus for winter. This spring wreath is a simple craft that you can make in less than an hour.
When I started planning this craft, I wanted something that would look good for months instead of swapping my decor for every spring holiday. This raffia wreath is the perfect spring decor. It has a pretty pop of color but isn’t based on any one holiday. It could actually stay up year-round if you don’t like to swap out your decor with the seasons.
Choosing raffia
Before you buy your supplies I wanted to point out that raffia is usually sold in two forms. The first is the smaller bundles that look like grass-textured ribbon. They’re nice and neat to work with, like when I made these raffia napkin rings. That type of raffia comes in small rolls, so you would need quite a lot to make a big wreath.
The second type of raffia is packed a lot like Easter grass. That means when you open it, it’s going to go everywhere and make a mess. This is the kind you need for this project. Don’t worry, it’s also easy to clean up.
How to make a raffia wreath
Supplies
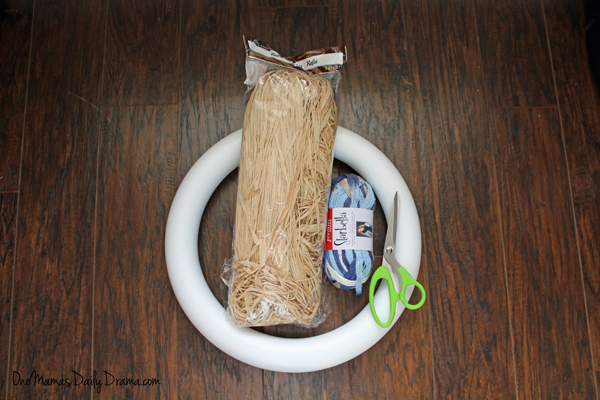
- 16-inch foam wreath form
- large package of natural raffia
- decorative yarn (You need only a few yards, so scraps from another project are fine. I used Starbella mesh yarn.)
Instructions
1. Separate the raffia.
Start by making a big mess in your living room. Open the raffia and unroll it. You’re going to separate it into sections of 3-5 strands to wrap, so expect some flyaways. Mine was in sections about 24-30 inches long.

2. Begin wrapping the wreath.
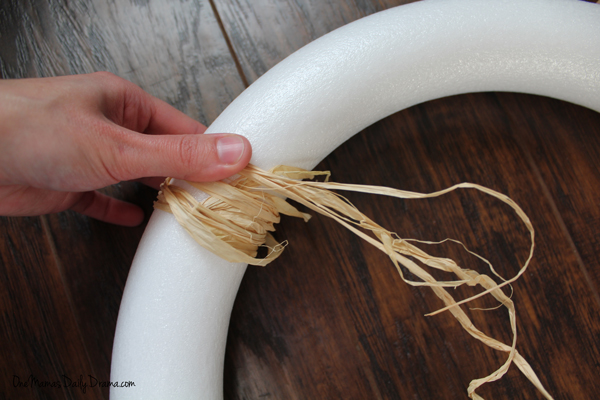
Start anywhere on the wreath form. Leaving about a 1-inch tail, wrap the raffia around the wreath once. While holding the tail against the foam, wrap the raffia over it so that it holds that tail down securely. Keep wrapping that piece until you get to the end of it. You’ll need to hold each end tail until you start wrapping the next bunch of raffia.
3. Continue wrapping to cover the foam.
Repeat the wrapping process all the way around the wreath form. Use one hand to hold the tail of a bundle while you wrap the next section over it. There will be some pieces of raffia sticking out at this point. Just ignore them and wrap evenly until you’ve covered the whole wreath form.

4. Tie off the raffia ends.
When you get to the end, you’ll need to tie the raffia. For the last bundle, leave a longer beginning tail, about 3-4 inches. Don’t wrap the raffia over it this time. When you get to the end of that bundle, leave a tail of the same length. Tie the two tails together on what will be the back of the wreath.

5. Wrap the yarn around the wreath.
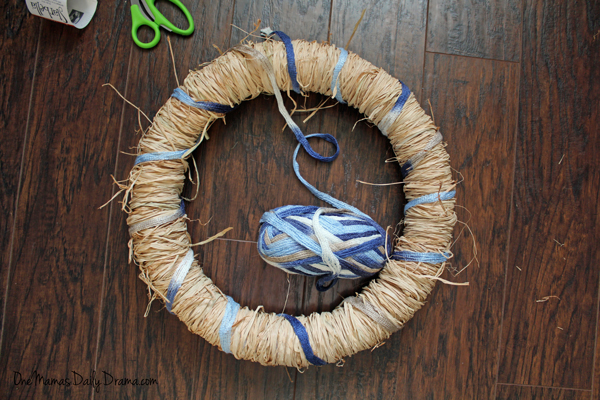
Finally, it’s time to add the yarn. I chose one of those fancy ones that isn’t great for crochet but looks really fun. Start where you began and ended the raffia. Leave a 3-4 inch tail and don’t cover it. Start wrapping the yarn around the wreath, leaving wide gaps.
6. Wrap the yarn backward over itself.
When you get back to the starting point, loop the yarn around the back and start going backward around the wreath. Make an X with the yarn, crossing each piece that you wrapped on the first round. This creates a nice little crosshatch design. You can tuck some of the stray bits of raffia under the yarn, but some of it is going to stick out and look rustic.

7. Tie off the yarn.
When you’re back at the beginning again, leave a long tail and tie it off with the tail from the beginning end of the yarn. Cut another piece of yarn that’s about 8 inches long or so. Loop it around the wreath and tie a knot at the end for hanging the wreath.
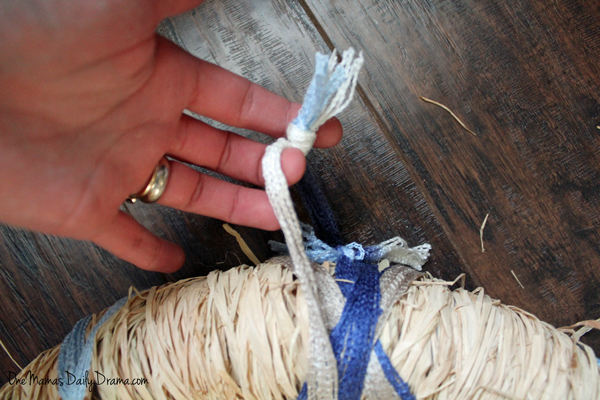
You can hang this wreath with a wreath hanger that goes over the door if you like. I put mine up using a removable metal Command hook. I think it looks fantastic.
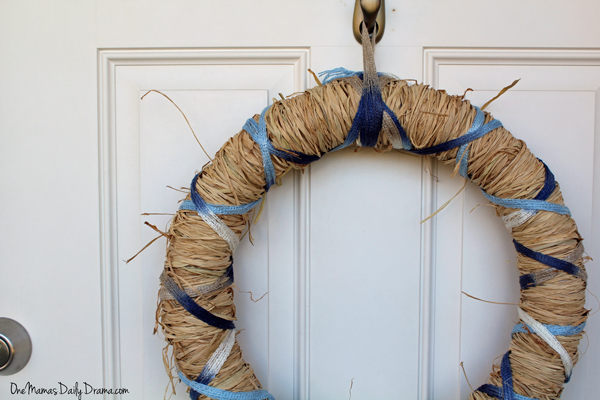
This wreath is so easy to make! Altogether it took me less than an hour, including the time I spent vacuuming up little bits of stray raffia in my living room afterward.

What’s next? Try these other fun and creative ideas on One Mama’s Daily Drama:
This is such a cute idea! Thanks for joining the Tips and Tricks challenge!
Thank you! Tips & Tricks is always a fun party!