
Add these printable Christmas labels to any holiday gift or make a few of these mini gift baskets for a themed treat.

Disclosure: This blog contains affiliate links. As an Amazon Associate and member of other affiliate programs, Keri Houchin earns a commission from qualifying purchases at no additional cost to you.
This craft was originally shared in 2017 as part of my Christmas gift ideas with printables and has been updated for clarity.
Sometimes it’s hard to come up with a gift idea for everyone on your list. Maybe you drew someone you’re not as close to for the family gift swap. Or you’re participating in a secret Santa at work.
Anyway, if you have a general idea of what your gift recipient likes, a mini gift basket filled with small items is a treat. No single item is very expensive and almost everyone loves looking through a gift basket. It’s kind of like a little treasure chest.
Mini gift basket themes
When personalized with a theme you know the recipient will love, a gift basket is a fun and easy gift idea. I filled this one with cosmetics (hair elastics, nail files, nail polish, and chapstick) inspired by my teen’s favorite products.
Here are some more fun ideas:
- baking theme (paper muffin cups, cookie cutters, sprinkles, etc.)
- planner theme (stickers, washi tape, pens, etc.)
- science theme (supplies to make slime, maybe?)
- office theme (paperclips, tape, fancy pens, a staple remover, etc.)
Printable Christmas labels
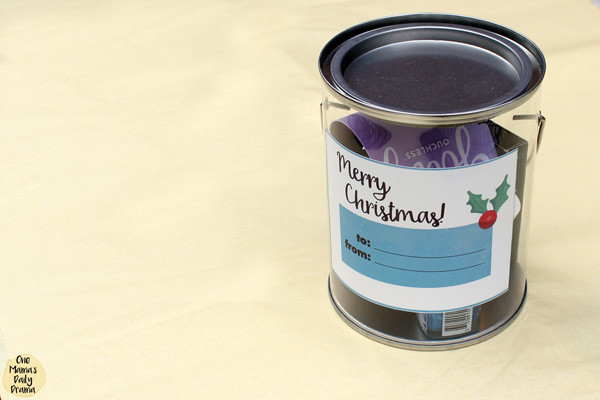
These tags are rectangular and large, so they will work for all kinds of packaging, although I think these paint buckets are pretty cute.
There are 6 designs in this label set – 3 that say Merry Christmas and 3 without text. I recommend printing these on sticker paper so they’re easy to apply to the buckets.
Supplies
- Paint bucket favor container
- Small gift items
- Sticker paper
- Printable 4×3-inch rectangular labels (download below)
Instructions
1. Print and cut out the gift tags.
I recommend printing this on sticker paper that you know you can write on. You can use regular scissors or a paper trimmer to cut around the outside of the tags.

2. Stick the label to the package.
Peel off the backing and stick the label to the side of the paint can. You can write on the to and from lines before or after sticking it.
2. Fill the containers.
Add small gift items to the paint buckets. The labels cover the contents enough, but you could also add some tissue paper inside if you want these to be a little more of a surprise.

Get the printable
Printables are free for subscribers. Sign up below to have this printable sent to your inbox. (If you’re a new subscriber, you’ll need to confirm your email address first. Check your spam ~ the emails are nearly instant.)
Don’t want another newsletter? No problem. Join The Printables Library for a one-time fee and get all the printables in one place. If you’re already a member, you can find this file there now.
Terms of use: All printables are for personal use only (home, classroom, library) and are not to be redistributed or sold. Please share by sending your friends to this blog post!
What’s next? Try these other fun and creative ideas on One Mama’s Daily Drama:
Leave a Reply