
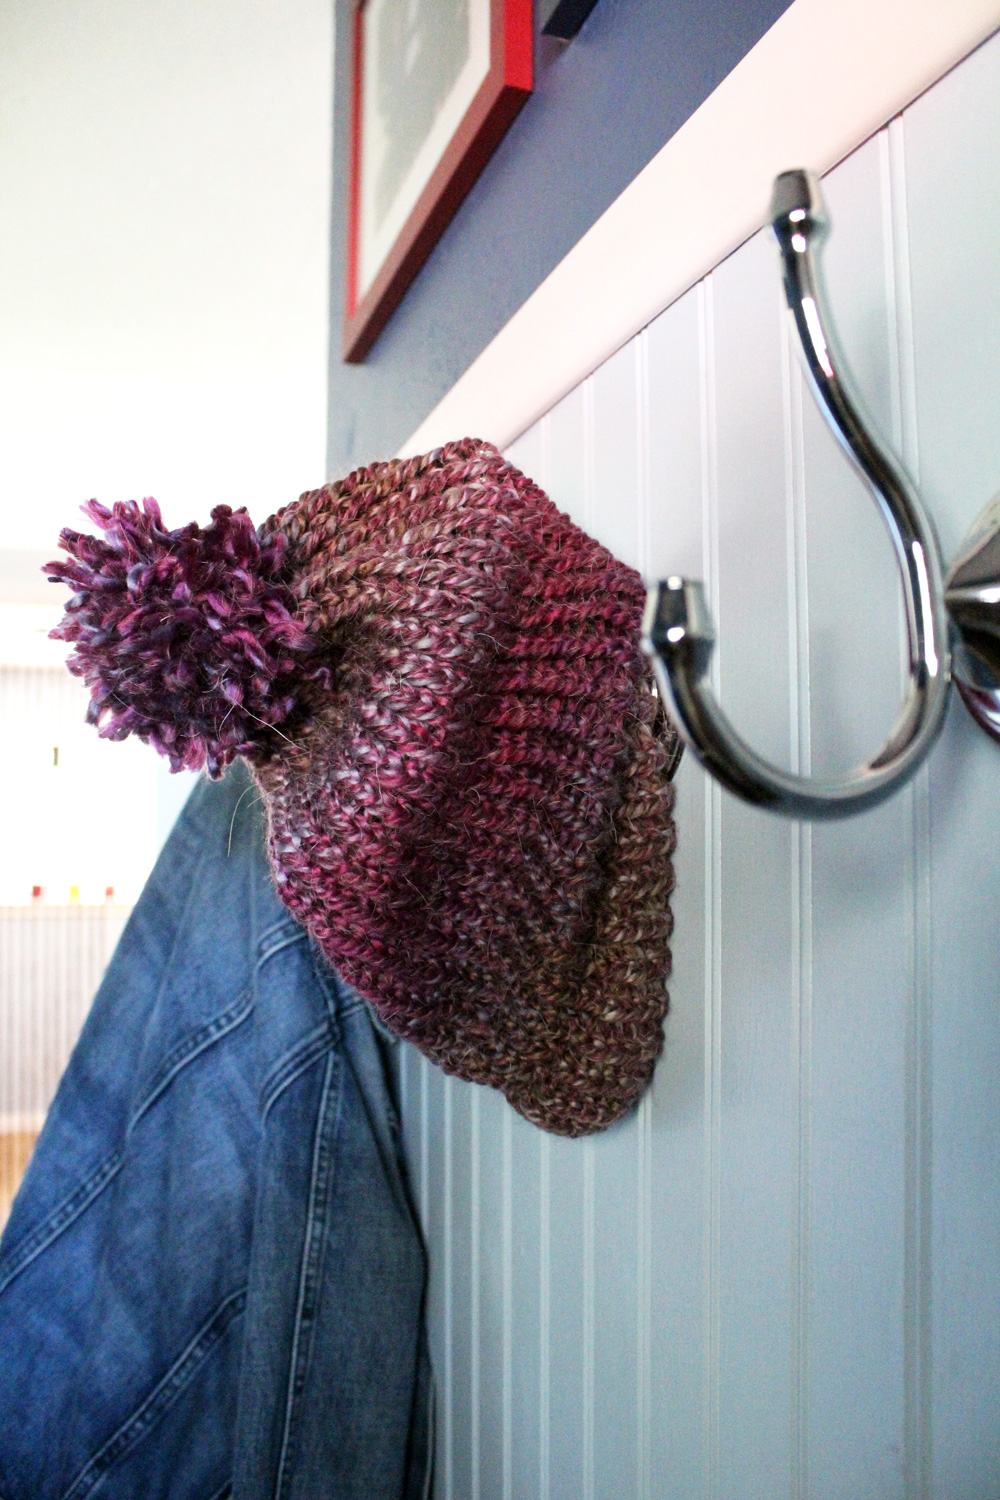
Make a loom knit hat with this easy beginner craft tutorial. A cozy beanie is perfect to wear all winter and a great handmade gift.
Disclosure: This blog contains affiliate links. As an Amazon Associate and member of other affiliate programs, Keri Houchin earns a commission from qualifying purchases at no additional cost to you.
This post was originally published in 2015; it has been updated for 2021 with new photos and a video.
I’m a bit of a fashion slacker and I always say winter was made for people like me. I can put on a cute fuzzy hat and look fantastic, even if my hair is having a bad day.
It’s pretty easy to make your own loom knit hat. This tutorial will teach you how, so you can have a warm winter hat to match every outfit. A handmade beanie also makes a great gift!
If you read my loom knit scarf tutorial, this post will seem a bit familiar. If not, go read that one too. Making a hat or a scarf is surprisingly similar when using a knitting loom.
How to make a loom knit hat
Supplies
- Loops & Threads knitting loom set (includes a metal hook and plastic needle)
- yarn, approximately 100 yards for a hat
- Medium yarn for a thin hat; bulky yarn for a thicker hat.
- I recommend Loops & Threads Charisma for beginners because it’s very stretchy and plush.
- The purple ombre yarn pictured is a medium-sized acrylic/alpaca blend.
- scissors
- crochet hook (any size, mine is US size J)
For the pompom, you’ll also need: a ruler or a similarly shaped item
Instructions
1. Choosing the hat and loom size.
Before you get started making a hat, you need to know how big your hat should be. The stretchier the yarn is, the more flexible the sizing. Here are my general guidelines:
- Newborns to toddlers: use the 5.5-inch loom
- Kids and small adults: use the 7.5-inch loom (This is what I’m using for this hat tutorial.)
- Average adults: use the 9.5-inch loom
- Larger adults: use the 11.5-inch loom
2. Beginning the hat.
Start by tying one end of the yarn in a slipknot over the anchor peg on the side. This keeps your yarn from unraveling as you go. You won’t use this peg for any other steps and you’ll even until this anchor end in a few steps.

3. The “e” wrap pattern.
Next, start wrapping the yarn around each peg on the loom. This is called “e-wrapping” because the yarn resembles a cursive e. Make sure the flat side is on the inside and the loops are on the outside of your circle, as pictured.

4. Creating the knit weave.
When you get back to the beginning with the “e-wrapping”, continue a second time around on each peg. This will create 2 rows.

Hold the end of the yarn and the loom in one hand. With your other hand, use the metal hook to pull the bottom loop up and over the top loop and the peg. That yarn loop will slide into the center portion of the loom, hanging onto the row that’s still attached.

5. Releasing the anchor knot.
Wrap the yarn around each peg again. This time you only need to go once around. Pull the bottom loop up over the top on every peg again. Repeat for several rounds, then can untie that original slipknot from the anchor peg and let the tail just hang off the end.
If you’re adding a brim, you’ll hide it inside. If you’re not, you can just weave it into the hat edge when you’re finished.
6. Making the hat brim. (Optional but recommended)
Continue “e-wrapping” and pulling up loops to create additional rows. Repeat this until you have about 3 inches of knitted yarn. This takes about 10 times around, depending on how thick your yarn is.
Then take each loop along the beginning edge of the hat and hook it over the coordinating peg. This will give you 2 loops on every peg. This folded section makes the brim of the hat.
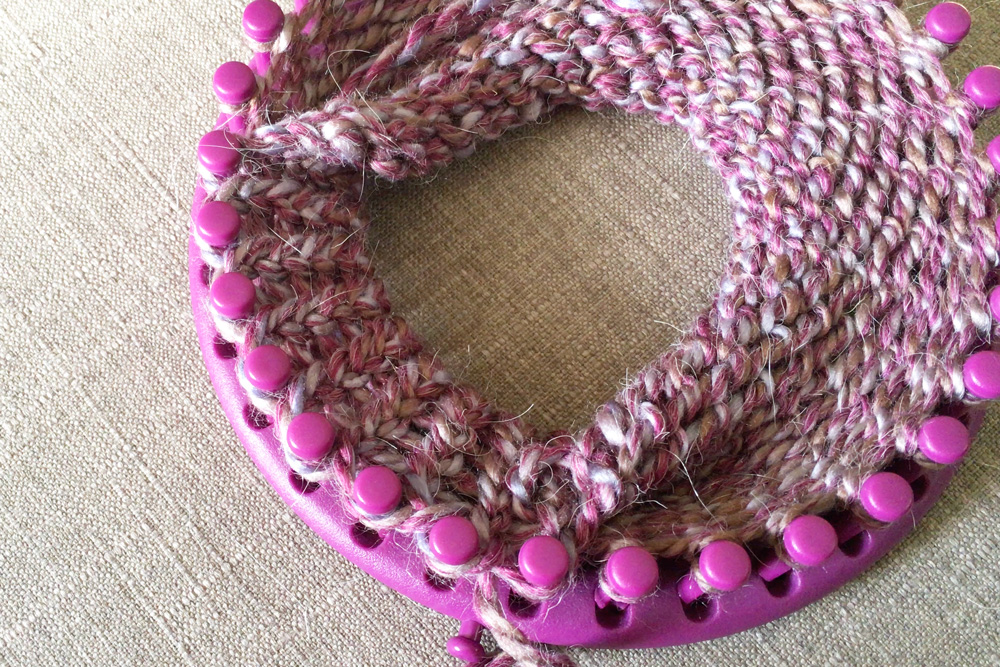
You can tuck that anchor tail of yarn inside the brim to hide it.
Pull the bottom loop up over the top loop that you just added. You should have a kind of tube band going around the circle. This basically holds the bottom of the hat in a folded band.

7. Continuing the hat length.
Continue “e-wrapping” and pulling up loops to add rows to the hat, until it is the desired length. This will depend on the size of the person wearing it. Here’s a general guideline:
- Newborns to toddlers: 5 to 7 inches
- Kids and small adults: 8 to 9 inches
- Average and larger adults: 9 to 10 inches
I don’t count stitches while I’m knitting because I always lose count. Depending on the size and stretchiness of your yarn, there are approximately 5 stitches per inch.
8. Finishing the hat.
When you are ready to take the hat off of the loom, a crochet hook is very helpful.
Cut the yarn, leaving a tail about 10 inches long. Starting on the first peg after the tail, lift each loop off of its peg onto the crochet hook. Loop the tail over the hook and pull it through the yarn. Repeat that with every loop, creating a drawstring that goes around the top of the hat.

Pull the yarn drawstring to close the top of the hat. Loop the yarn around the top row to tie a secure knot and trim the extra yarn.

The basic hat is complete!

Adding a pompom. (Optional)
You can use a pompom maker if you have one, but I made mine using a ruler. You can use the remaining yarn from the hat (several yards) and that last tail that you trimmed off of the top.
1. Make a thick yarn ring.
Leave a few inches at the end and wrap the yarn around the ruler snugly. Tie the 2 ends together.
2. Thread yarn into the ring.
Thread that last little bit of yarn through the ring with the ends hanging out each end. A crochet hook makes this easier.

3. Tie the yarn into a ball.
Slide the yarn ring off of the ruler, keeping it on the short yarn you threaded through the center. Tie that yarn piece in a tight knot, creating a ball of yarn.
4. Cut the loops.
Use scissors to cut all of the loops to create the pompom shape. Trim as needed, but leave the tails on your center knot.


5. Attach the pompom to the hat.
Use the 2 tails to tie the pompom to the top of the hat. Thread them through the ring at the top and knot them inside the hat. Trim the ends on last time.

Once you’ve made a few loom knit hats, the process will get easier. Experiment with different types of yarn to find which ones you like best. Make a matching scarf.
You might also like to make a loom-knit ponytail and bun hat to wear with long hair up.


What’s next? Try these other fun and creative ideas on One Mama’s Daily Drama:
This made it a lot easier for me to learn to do loom knitting. Just need to learn how to do a flat scarf that doesn’t curl. I want to use a loom for it
I have a loom-knit scarf tutorial here: https://onemamasdailydrama.com/loom-knit-scarf-beginners. It is kind of hard to keep the ends from curling a bit. I think a really stretchy/elastic yarn helps with that because it will keep the ends tighter. With the loom, the ends are usually a bit looser than the middle. Tassels can also help keep the ends straight.
The ends didn’t curl the whole scarf did.i don’t know how I can flatten it out.
Can you make a flat scarf just using one side of the rectangle loom?
I think so, but I’ve never tried it before.
Hmm… It sounds like maybe you’re wrapping the yarn too tight. I do get that problem sometimes. Depending on what kind of yarn you used, you might be able to spray it lightly with water and stretch it out. I don’t have a tutorial I can show you, but I would recommend searching for “blocking” or “how to block knitting.”
How many rows do you do for adult hat on round loom. Not including brim
It really depends on the size of the adult and the type of yarn you’re using. {Some yarn is much stretchier, so you would need less of it.} I make my hat about the same size as my daughter’s here, but I’m a relatively small woman. My husband has a big head {sorry Hubby} so I think I made his maybe 2-3 inches longer. Use a soft tape measure and measure the person’s head from where the hat would hit the forehead to the top where the center of the hat would be.
What did you do with the end with the slip knot after you pulled it off and let it dangle>
The one near the brim? That’s at the end – Weave in the tail that is on the brim end of the hat. You’re basically just hiding it inside the brim.
Just wanted to say thank you so much for your scarf and hat loom tutorials! Your posts helped me make the perfect scarf/hat gift set for my 102 year old grandmother who lives in Chicago! I really appreciate it and I know she will too. ?
Awesome! Your comment just made my day. ?
You have great instructions and I’ve made a couple of hats and scraves, but to me it’s easier to do it the old fashion way and alot faster.
Hi, trying looming for the first time, and I think o can do this, but I messed up earlier, because I think in the beginning, I covered the anchor peg, are you supposed to wrap all around or leave the space like an E, you know what I mean?, my project I did today making a hat wasn’t so great.
The anchor peg is there so that your yarn doesn’t unravel when you’re starting a project. Tie a loose loop on the anchor to start. When doing the “e” wrap, just go around the top pegs and ignore the anchor. After you’ve gone around the loom about 3-5 rows, you can untie the anchor and let that end hang loose.
Hope that helps!
Another easy to follow tutorial! My daughter and I made hats together and they turned out great. My daughter is already working on her second one. Thank-you for the great pictures and explanations.
You’re very welcome! I love hearing that my readers had success with a project!
How many rows do you knit for a slouchy hat with & without brim? I am a beginner and using just a knit stitch so far.
I am knitting hats & donating to people in need in my community…so rewarding.
For one of my slouchy hats, I think I used the 11.5-inch loom and did about 32 rows after the brim. If you want to include a brim, just follow the directions in the post (10 rows, then fold) and add more rows. If you don’t want to do a brim, just skip the folding part and do a total of 32 rows.
There’s a lot of room for error with loom knitting a hat, so my best advice is to just keep testing what works best for you!
Thank you for your quick reply & good tips.
How many inches would you recommend for the brim for a baby hat under 2yrs old?
It mostly depends on the size of the baby. My kids were tiny when they were little, but I have a friend whose 10-month-old is about the size my son was at 2. That being said, I think I would aim for between 1 and 2 inches for the brim.
Hi Keri. Thanks much for your easy to follow tutorial.I am glad to come have across this site. I just purchased the materials ( as I always wanted to learn ) but was nervous about different terminology , and wasn’t sure how to get started, till I seen this website. Now I will surely try this project, all thanks to you for such a great teaching method ( I am visual learner ) .you are indeed a great teacher, thanks again. God bless.
Thanks so much for your kind words! One of these days I’m going to get around to making a video. I’m glad this tutorial helped you!