
This is a guest post written by Hubby. Show him some comment love!
As many readers know, we have been working on creating an outdoor hang out area and garden in the backyard for quite some time now. First we built a patio and I thought, “This is nice. We’ll probably stop here.” Then came the vintage chairs that used to belong to my great grandmother and, once again, I thought, “Now, we are set.” Next was the umbrella, for which I made a stand by drilling a hole into an old stump. Silly me, I knew for sure we were done then.
Keri decided that what we really needed to make the patio area perfect for evenings in the back yard was a coffee table and some lighting of some sort. Of course it needed to be crafty and rustic, but also attractive. I offered to make a coffee table.
Now, I’ve never actually made a table before, though I’ve done quite a bit of wood working since January of 2011. Most of my wood working has been wand and walking stick carving, but I’ve tried my hand at a few other larger projects here and there. I expected that we would buy some cheap cedar boards for the table, which could be sanded down to something spectacular; however, we had a windfall (literally) that changed everything.
A few weeks ago, there was a big storm and the top half of a sycamore tree a few blocks over came down. I grabbed my chainsaw, called a buddy and went over to help cut up the tree. After a couple hours, I came home with a van loaded down with logs. I know that to the poor guy in the front yard with a 4-in. hand saw, a fallen tree was a near disaster. However, to me it was patio furniture.
After getting the wood home, I did a lot of researching on how to convert (turn into boards) and season (dry for use) wood at the library. Since I lack a kiln, general consensus is that the wood should sit for at least a year before trying to make anything out of it. Needless to say, we were not willing to wait that long for a patio table, so I started the next day.

Step 1: Turning logs into boards
I used a chainsaw to split the logs into rough boards. Since we wanted to keep the rustic log look, I didn’t try to square them. After cutting the logs into rough boards, I spent a lot of time with my belt sander smoothing and leveling them out.

Step 2: Turning boards into a table top
As I do not frequently blog about my projects, much to Keri’s chagrin, I forgot to take pictures of this part. I laid the boards that I was happy with face down and marked where I wanted my support beams to go. For the support beams, I used some pine boards that were once the slats for an Ikea bed that has long since made its way out of my house. Although it isn’t from the sycamore, it’s still recycled wood, so I think it counts. Plus, I tried to convert some of the sycamore into nice even boards for this part and only met with frustration. (Oh, for a planer!) After I had boards marked, I used the chainsaw and a chisel to create grooves for the support boards to fit in. The real benefit of doing it this way was that the logs maintain the round, uneven profile but I have a nice, even table top. I screwed the boards to the support and evened out the ends of the table top.
Step 3: Patio table legs
According to a very quick internet search, the average coffee table is 16 to 18-in. tall. I took some smaller logs and cut them off at 18-in., thinking that it would be a lot easier to make it shorter than taller. I drilled a 1.5-in. hole into the table top and through the support board for each corner to receive the legs. Next, I used the same drill bit to mark the tops of the legs so I would know how large the diameter of the leg dowels would need to be. Starting about 2.5-in. from the top of each leg, I used my reciprocal saw and sander to create dowels. After I checked to make sure the dowels would fit in the holes I drilled, I cut the dowels vertically in the middle so they would accept a small wedge, which I also created from little bits of sycamore that now littered my garage. After all four legs were prepped; I slipped them in the holes in the table top, liberally glued the dowels and wedges, and then drove the wedges into place.

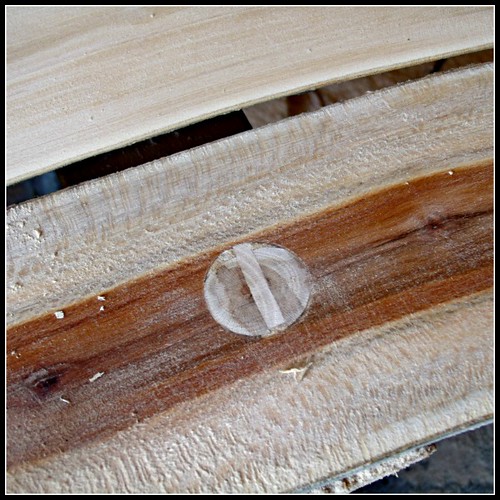
Step 4: Finishing touches
After the glue had dried, I cut off the bits of the legs that were above the table top and started sanding. Then I sanded some more, moving to a higher and higher grit of sandpaper so that the table top was increasingly smoother. Then I proudly showed Keri her table, which was determined to be a bit more wobbly than she wanted. Fortunately, with rustic furniture, this is a very easy fix. I grabbed some more branches, drilled pilot holes, and nailed them into the legs at a diagonal. Diagonal support, according to a book I read on building rustic furniture, keeps it from pushing out of alignment and, since you aren’t working with perfectly straight lumber, hides the fact that everything is not precisely lined up. All that was left was to rub it down with tung oil, putting several coats on. Finally, I had a finished table!
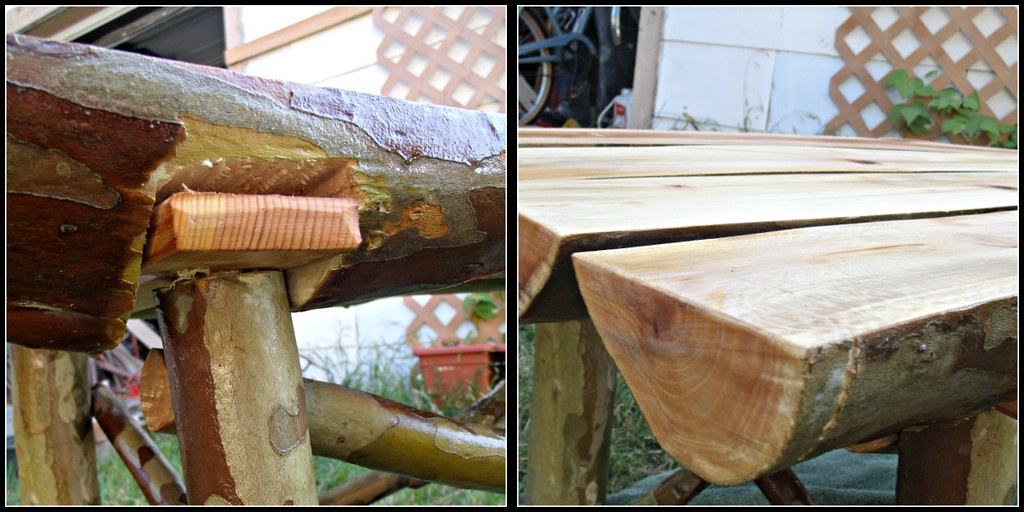
Despite the fact that the project was more of a free-form, no-actual-plan type of thing (my preference), it turned out to perfectly fit the patio. The kids discovered that the table is the perfect height for a dining table for them when they sit on their bench and are desperate to eat in the back yard at their new table. The wife is thrilled with how it turned out.
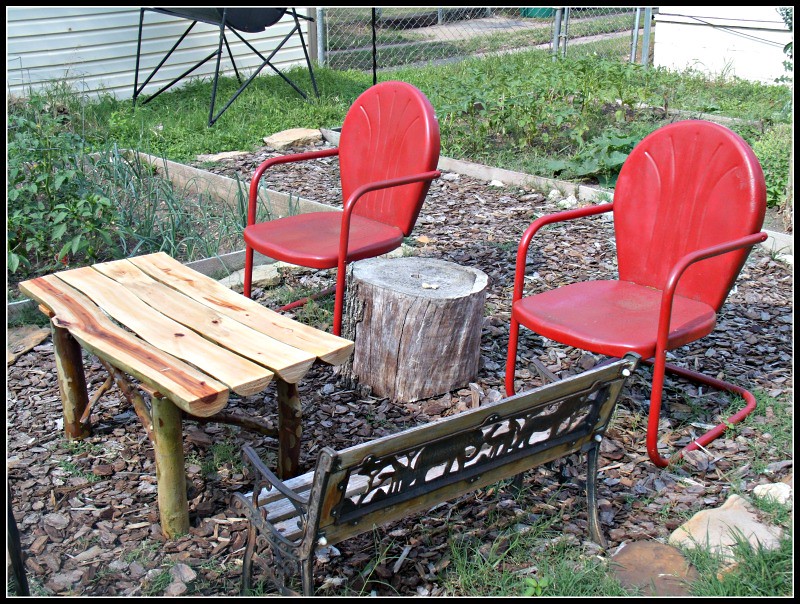
The only downside is now she wants a matching bedroom and living room set, after I finish some more tables and benches for her backyard…
Awesome! I love the table 🙂
Gorgeous! High fives for using recycled materials AND for making something that looks so fantastic!
Great Job!